BAKED SWEET AND SOUR CHICKEN

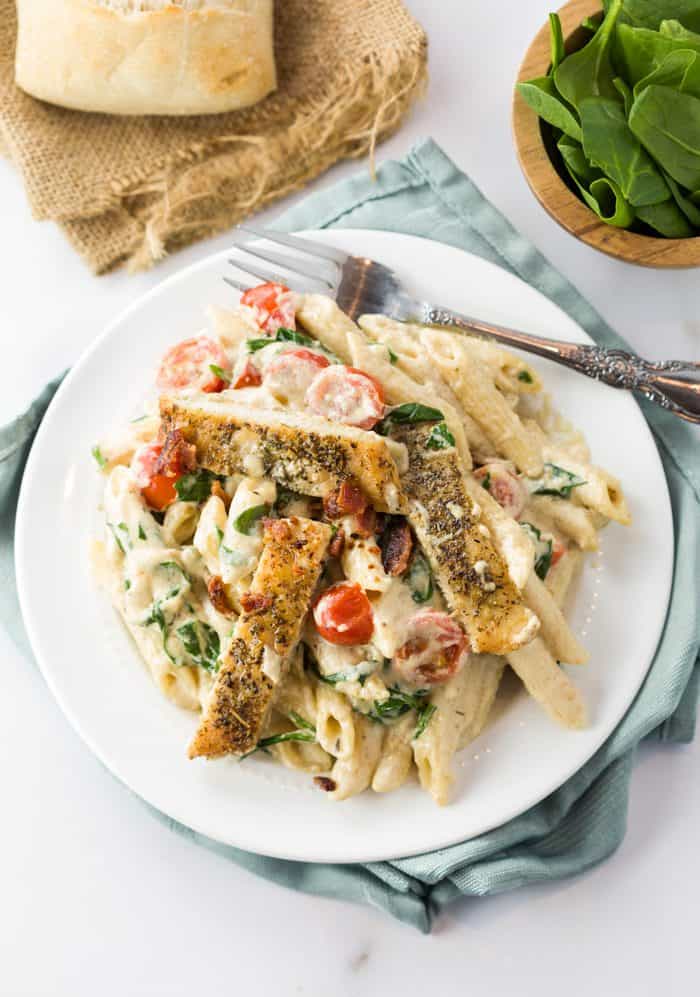
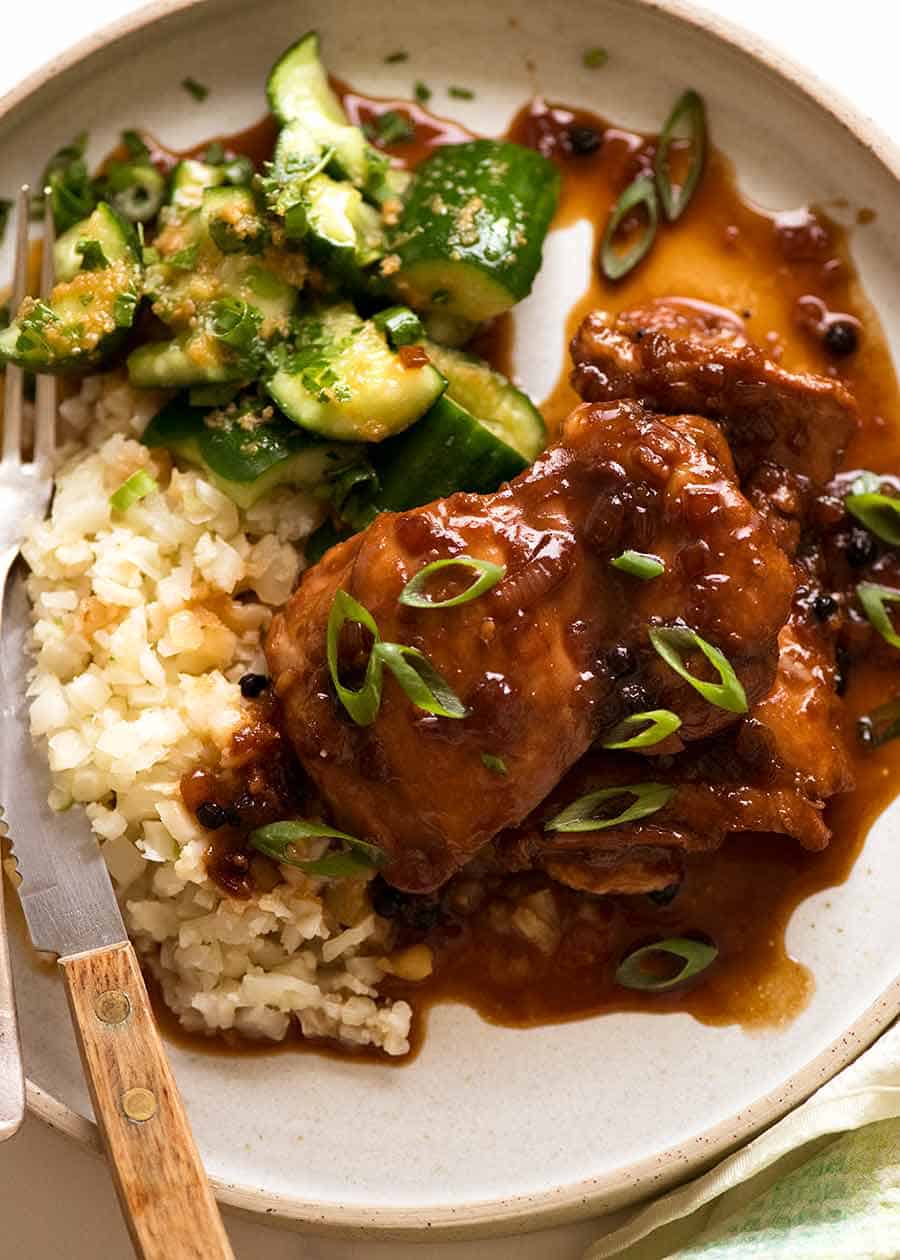
Baked Sweet And Sour Chicken Is One Of Our Family’s Favorite Asian Recipes! You Can Add Pineapple And Peppers And Serve With Rice Or Noodles To Complete This Flavorful Dish!

This baked sweet and sour chicken is a family favorite and often served with egg rolls or fried rice. If you love this recipe, you’ll also love our General Tso’s chicken .

BAKED SWEET AND SOUR CHICKEN

A CLASSIC WITH A TWIST

The sweet and sour sauce is made with only a handful of ingredients that you probably already have on hand. It all comes together fairly quickly and then you just toss it in the oven to bake for 20 minutes.

The hardest part is just patiently waiting for it to bake! But trust me, it is well worth the wait because the chicken comes out of the oven tasting DELICIOUS!! I can seriously eat it all by myself.

BAKED SWEET AND SOUR CHICKEN 2

HOMEMADE SWEET AND SOUR SAUCE

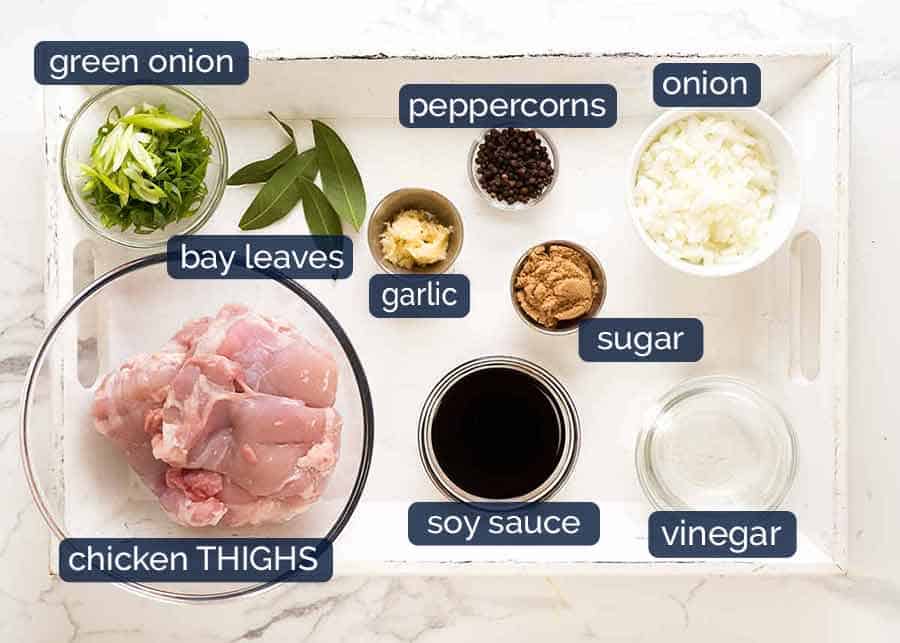
Not only is it simple, but it’s so flavorful and works for any chicken or pork recipe . Here are the ingredients…

Ingredients

  • ¼ cup pineapple juice
  • 2/3 cup water
  • 1/3 cup vinegar
  • ¼ cup brown sugar
  • 1/2 cup sugar
  • ⅛ tsp. salt
  • 1/4 cup Ketchup
  • ¼ cup soy sauce
  • 3 TB cornstarch mixed with ¼ cup water

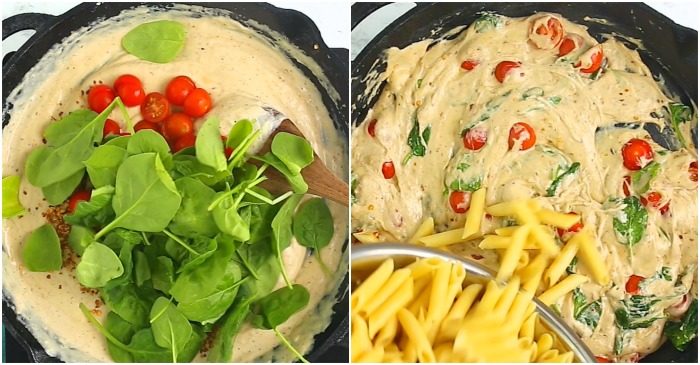
To make the sauce, combine pineapple juice, water, vinegar, sugars, salt, soy sauce and Ketchup in a medium pot and bring to a boil.

From there, you thicken the sauce with cornstarch mixed with ¼ cup water stirring occasionally. Add any pineapple chunks or chopped peppers and you’re set. Just pour over chicken or to use as a dip.

SAUCE NOTES:

Vinegar: I use white vinegar for this recie but you can also use apple cider vinegar or rice vinegar. You may notice a distinct vinegar smell during the baking process. Don’t worry about it affecting the taste. The vinegar burns off leaving behind a delicious sweet and sour sauce. 
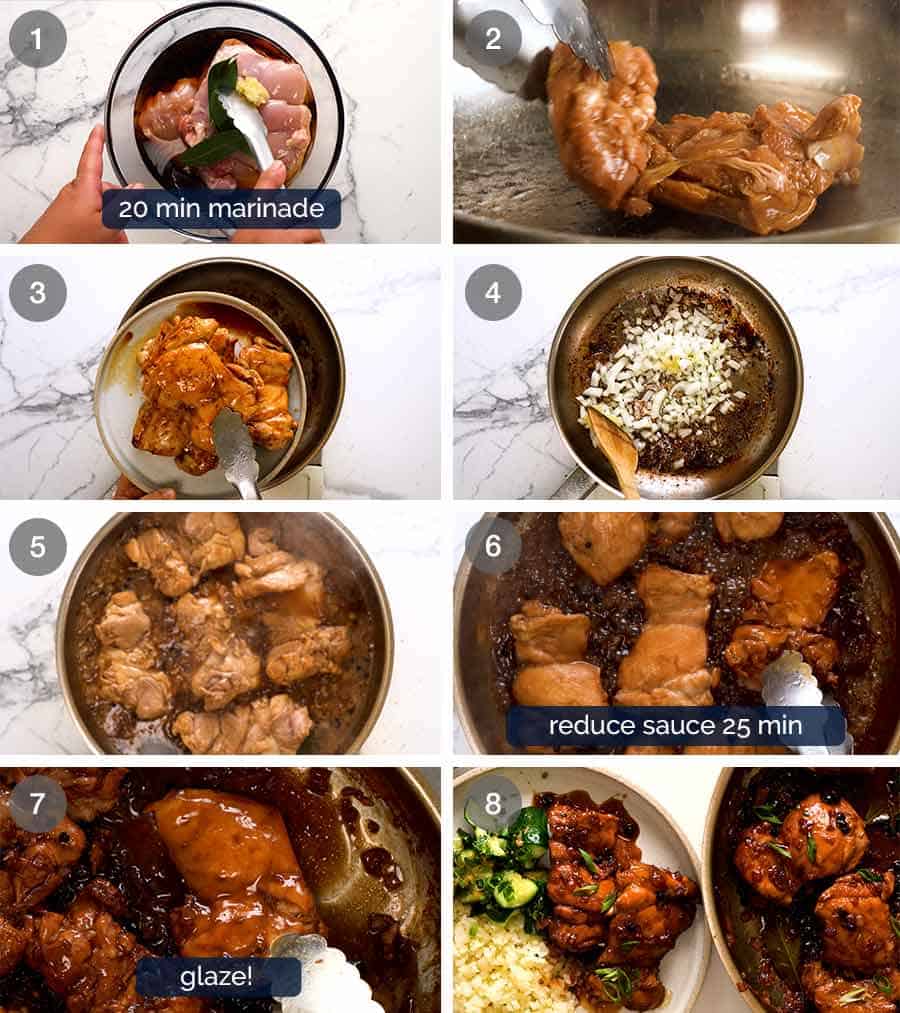
BAKED SWEET AND SOUR CHICKEN 3

BAKING, THEN FRYING

Other Sweet and Sour Chicken recipes tend to only fry the chicken after being covered in the egg and cornstarch batter. I’ve found that baking it helps thicken up the sauce more and make it even more flavorful.

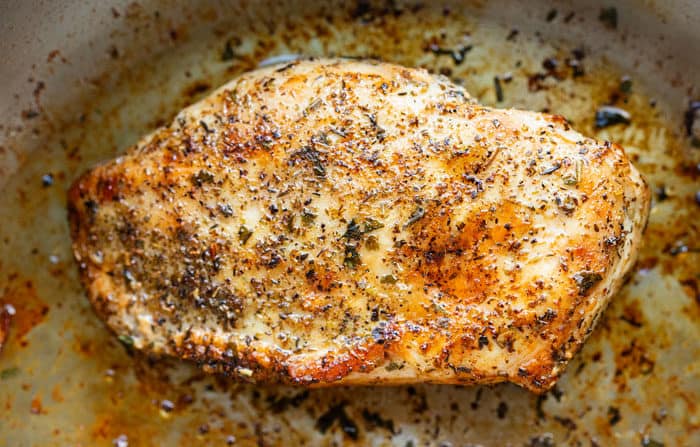
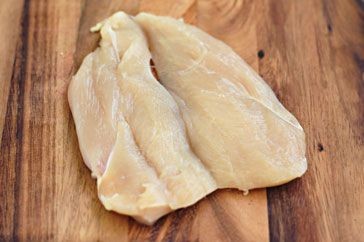
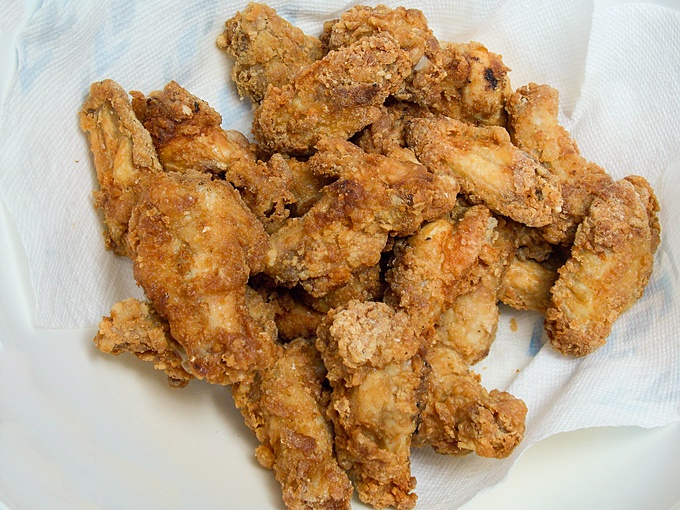
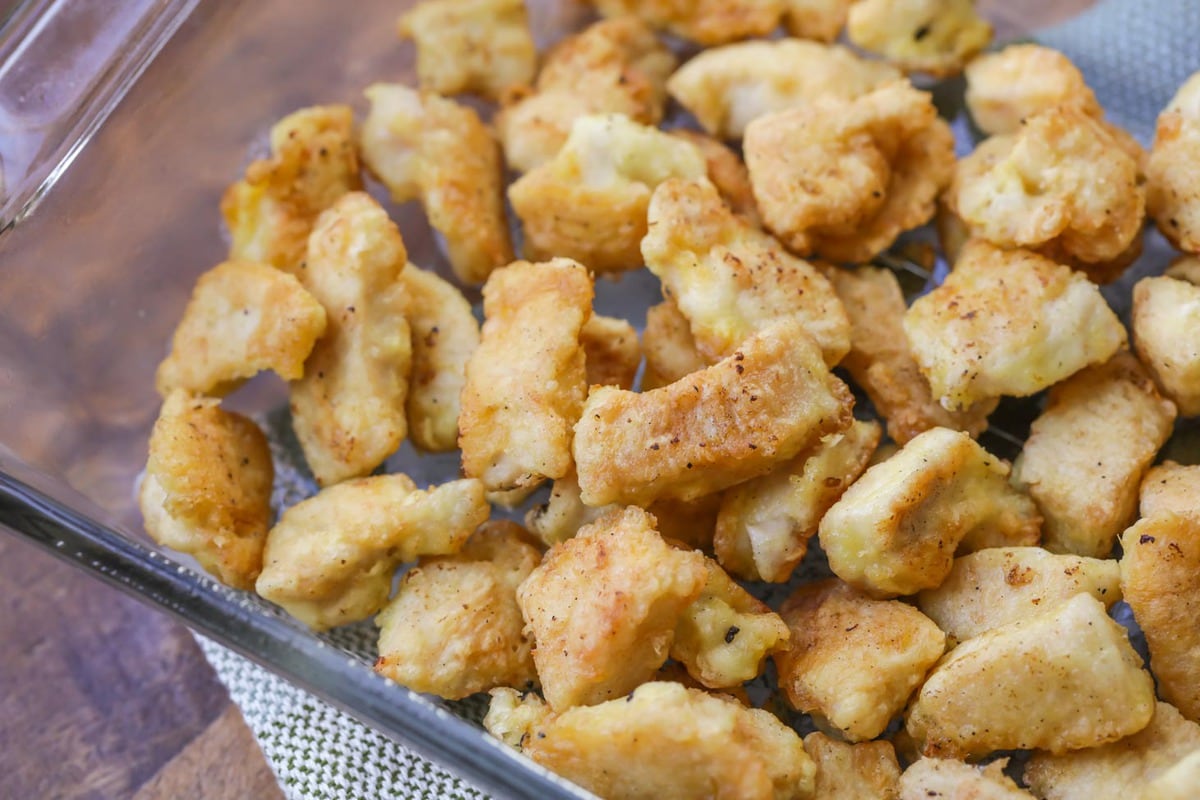
To make this chicken, preheat oven to 325 degrees. Rinse chicken in water and cut into 1 inch cubes. Place cornstarch and eggs in separate bowls.

Toss several pieces of chicken into the cornstarch to coat and then dip them in the eggs. Set chicken pieces aside on a plate and repeat until all pieces have been coated.

Heat ¼ cup oil in a large pan and cook your chicken for a few minutes on each side until they are slightly browned but not cooked all the way. Place the chicken in a greased 9×13 pan. Set aside and make the sauce.

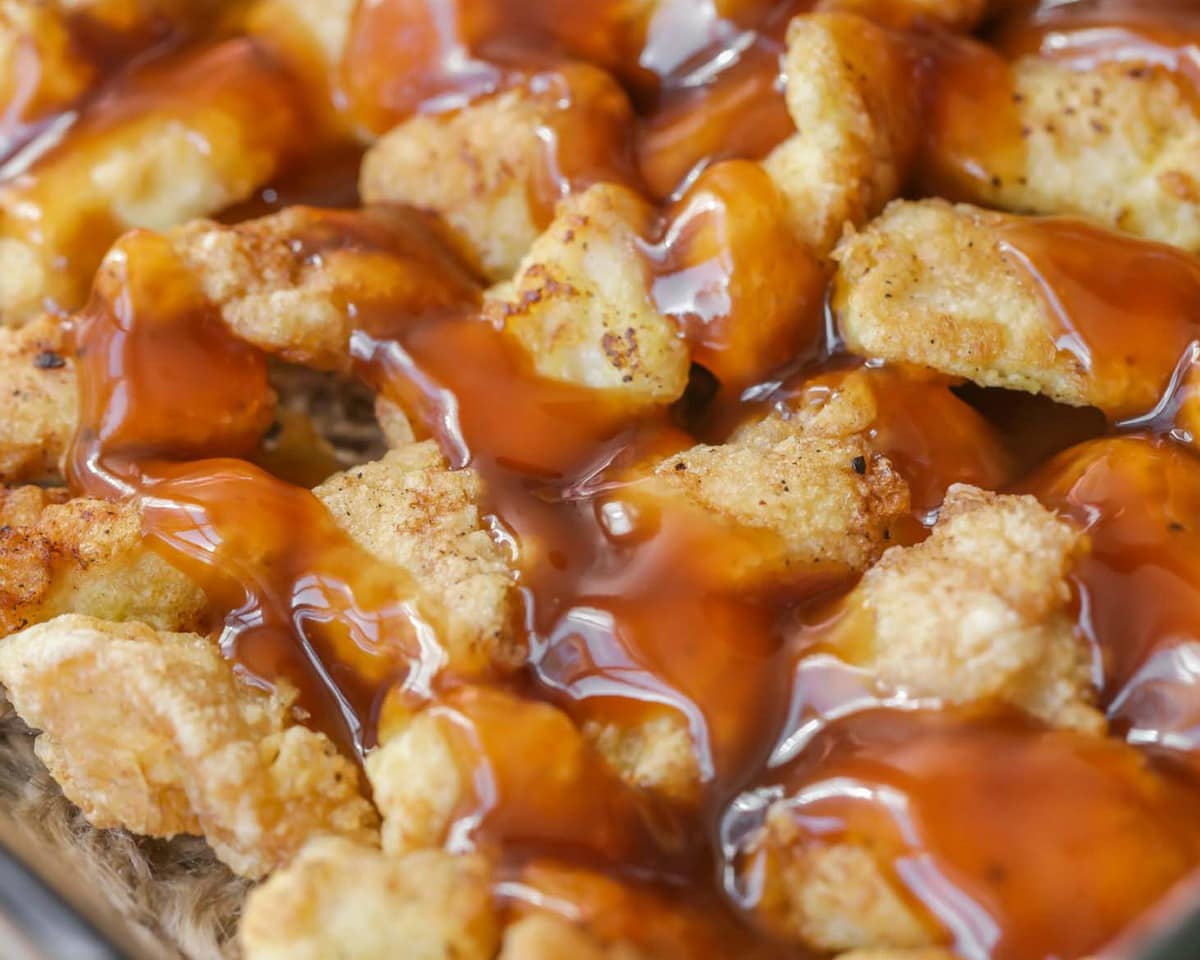
Pour the sauce evenly over the chicken. Bake for half hour turning the chicken at 15 minutes. (NOTE: I like to leave a little sauce for dipping egg rolls or cream cheese wont tons. YUM!)

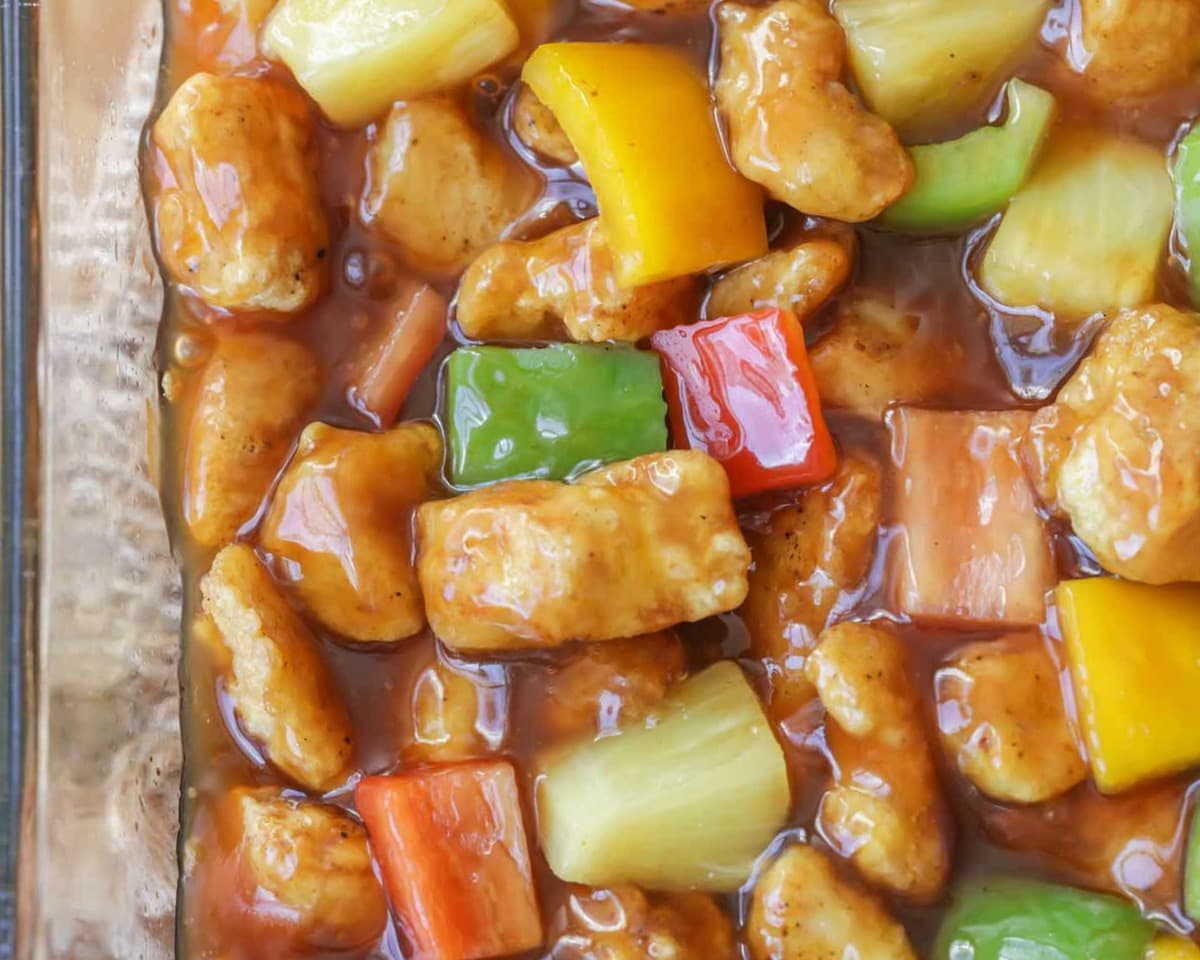
MORE VEGGIES. Pineapple chunks and bell peppers are added to this dish and are served on top of white rice. But you could easily add any of your favorite veggies like onions or snap peas, and then serve on top of brown rice or noodles, depending on what your family likes.

CROCKPOT: Add the browned chicken and sauce to a crockpot and cook on low for about 4-5 hours or on high for 2-3 hours. Then, add veggies and pineapple. Cover and cook on high for about 30 minutes or until the produce is tender. 

BAKED SWEET AND SOUR CHICKEN 3

MAKE IT A FREEZER MEAL

You can easily turn this recipe into a freezer meal. You will save a lot of time by getting everything prepped for several meals all at once. On a busy evening, all you have to do is brown the chicken and bake.

  • Begin by cutting the chicken into bite sized pieces. Place chicken in its own Ziploc bag.
  • Place the cornstarch into a smaller ziploc
  • In a third Ziplock place all the ingredients called for in the sauce including the pineapple and peppers
  • Place all three bags in a larger Ziplock. Label and freeze for up to 3 months. Thaw in the fridge before cooking according to the recipe directions.
  • You can also have bags of frozen rice cooked and ready to heat up: Once the Rice has cooled place the allotted amount in a Ziploc bag. Freeze. To reheat place rice in a microwave bowl. Add a couple tablespoons of water cover and microwave until hot.  

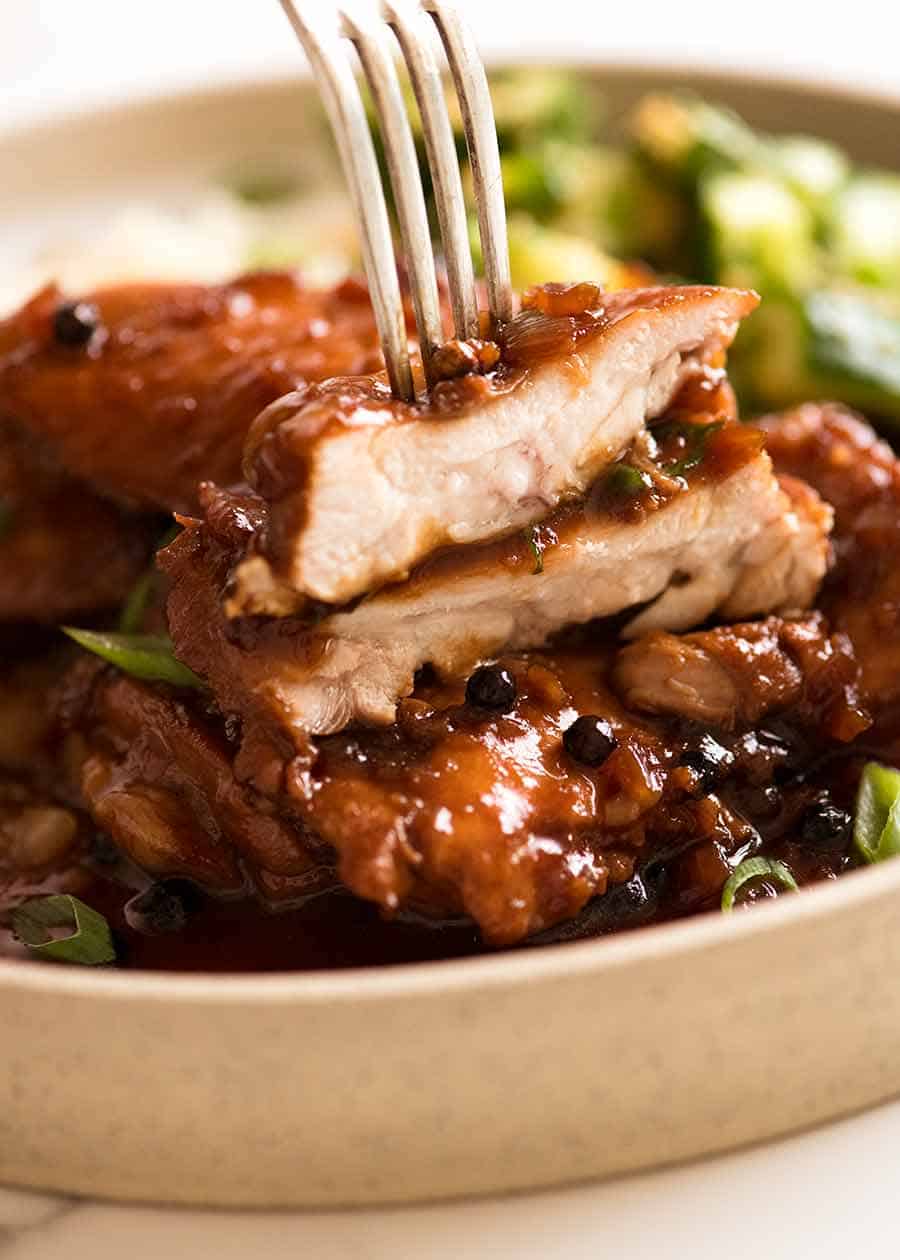
Between the consistency and the flavor, this recipe really is to die for! The savory chicken paired with sweet sauce, and complete with your favorite add-ins will make you want to never order takeout again!

Baked Sweet and Sour Chicken recipe

Baked Sweet and Sour Chicken is one of our family’s favorite Asian recipes! You can add pineapple and peppers and serve with rice or noodles to complete this flavorful dish!

Prep Time

 10 minutes

Cook Time 

30 minutes

Total Time 

40 minutes

Servings

6

Course 

Main Course

Cuisine 

Chinese

Author: Zeeshan

Ingredients

  • 3-4 boneless, skinless chicken breasts
  • 1 cup cornstarch
  • 3 eggs beaten
  • 1/4 cup canola oil
  • Pineapple Chunks
  • Chopped peppers

Sweet and Sour Sauce recipe:

  • 1/4 cup pineapple juice
  • 2/3 cup water
  • 1/3 cup vinegar
  • 1/4 cup brown sugar
  • 1/2 cup sugar
  • 1/8 tsp salt
  • 1/4 cup ketchup
  • 1/4 cup soy sauce
  • 3 TB cornstarch mixed with 1/4 cup water

Instructions

  1. Preheat oven to 325 degrees.
  2. Rinse chicken in water and cut into 1 inch cubes. Place cornstarch and eggs in separate bowls.
  3. Toss several pieces of chicken into the cornstarch to coat and then dip them in the eggs.
  4. Set chicken pieces aside on a plate and repeat until all pieces have been coated.
  5. Heat ¼ cup oil in a large pan and cook your chicken for a few minutes on each side until they are slightly browned but not cooked all the way. Place the chicken in a greased 9×13 pan. Set aside.
  6. For the Sauce: Combine Pineapple juice, 2/3 cup water, vinegar, sugars, salt, soy sauce and Ketchup in a medium pot and bring to a boil.
  7. Thicken sauce with cornstarch mixed with ¼ cup water stirring occasionally. Add desired amount of pineapple chunks and any optional ingredients. Pour evenly over the chicken.
  8. Bake for half hour turning the chicken at 15 minutes. (NOTE: I like to leave a little sauce for dipping egg rolls or cream cheese wont tons. YUM!)

Nutritional Information

Amount Per Serving Calories 463 Calories from Fat 126%

Daily Value*Fat 14g 22% ,Saturated Fat 2g 13% , Cholesterol 154mg 51%

Sodium 848mg 37% ,Potassium 525mg 15% ,Carbohydrates 53g 18%

Fiber 1g 4%, Sugar 29g 32% ,Protein 28g 56%, Vitamin A 204IU 4% ,Vitamin C 3mg 4%, Calcium 28mg 3% ,Iron 1mg 6%

* Percent Daily Values are based on a 2000 calorie diet.

Chicken and Bacon Pasta with Spinach

This easy Chicken Bacon Spinach Pasta has the best creamy Alfredo sauce and will quickly become your favorite dinner recipe!

Chicken and Bacon Pasta with Spinach

There are some tips about searing chicken that you should glance over first. Chicken that’s seared properly makes all the difference when you’re cooking.

Chicken and Bacon Pasta with Spinach 3

How to Make Perfectly Seared Chicken:

Cast iron skillets conduct heat very well and are perfect to use when searing meat.

Medium-high heat works well for searing, and it’s important to use oil with a high smoke point such as vegetable, canola, or peanut oil to prevent the meat from burning.

It’s important to refrain from moving the meat around as it cooks. Allowing the meat to stay in the same place in the skillet ensures that the sear isn’t disrupted. You’ll notice that the chicken starts to release from the surface when it’s ready. If it’s sticking a lot to the pan, it’s not done searing.

Butterfly the chicken and cut the seam to create two thinner slices of equal size. This will allow them to cook evenly and prevent them from being too thick.

How to butterfly chicken breast fillets

how-to-butterfly-chicken-breast-fillets 1

Butterflying is a technique used to make a thick piece of meat thinner, which makes it quicker to cook. Here’s how to butterfly a chicken breast.

Step 1

Using a sawing motion, slice through the breast almost to the end, being careful not to cut all the way through.

how-to-butterfly-chicken-breast-fillets-image-2

Step 2

Fold out the chicken. Press to flatten. Cook as is, or top with your favorite filling then fold in half and cook.

Don’t be afraid to season that meat and really get some flavor on there! Some of it will flavor the pan itself which will work it’s way into the sauce that you’ll cook in the same pan.

MakingCreamSauce
MakingCreamSauce

 Penne is also ideal for chunky and meaty dishes like this one. It’s easy to grab a nice big forkful that includes a little taste of everything.

Chicken and Bacon Pasta with Spinach 4

The Trick to Extra Creamy Parmesan Sauce

  • Refrain from adding cold ingredients into warm pasta when you prepare it. This includes the cheese, half and half, and/or milk. The consistency will be super creamy if you follow this instruction.
  • Purchase a block of high-quality Parmesan cheese. Always shred the cheese yourself, it will taste and melt much better.
  • Sprinkle flour over the cheese. This helps to thicken the water that separates from the cheese once it begins to heat up.
  • Let the cheese come to room temperature before adding it to the warm (not hot!base. 
  • Add the cheese gradually as opposed to all at once.
Chicken-Bacon-Spinach-Pasta 4

Servings

4

Chicken Bacon Spinach Pasta

Prep Time

10 MINS

Cook Time

25 MINS

Total Time

35 MINS

Author

Zeeshan

Course

MAIN COURSE

Cuisine

ITALIAN

Perfectly seared chicken served over pasta that’s smothered in a garlic Parmesan cream sauce with spinach and bacon!


Ingredients

  • 1/2 Tablespoon flour Optional
  • 2 tablespoons vegetable oil
  • 1 boneless skinless chicken breast, large in size
  • 1 teaspoon Italian seasoning a combo of thyme, oregano, & basil
  • Salt/Pepper to taste
  • 4 bacon strips
  • 10 oz. penne pasta

Garlic Parmesan Sauce

Ingredients

  • 2 teaspoons garlic minced
  • 2 Tablespoons all-purpose flour
  • 1 + 1/3 cups half and half
  • 1 + 1/3 cups Parmesan cheese shredded
  • 1 teaspoon red pepper flakes
  • 1 cup cherry tomatoes halved
  • 2 cups spinach uncooked

Instructions

  1. Shred the Parmesan cheese and set it aside to allow it to get to room temperature.
  2. Toss the cheese with ½ Tablespoon of flour. This is optional but will help the sauce remain smooth when the cheese is melted into it.
  3. In a large cast-iron skillet, heat 2 tablespoons of vegetable oil on medium-high heat.
  4. Butterfly the chicken breast and cut the seam to create 2 thinner slices, each about an inch thick. Season each side generously with Italian seasoning and desired amounts of salt and pepper.
  5. Sear the chicken in the hot skillet on each side. Refrain from moving the chicken around as it sizzles, it will hinder the nice golden sear color. If the pan gets too hot, reduce the heat to medium. Each side will take 3-5 minutes. Once each side is a nice, golden brown and the middle is cooked, set the chicken aside.
  6. Reduce the heat to medium low and add the bacon to the same skillet. Low and slow is the best way to cook bacon.
  7. While the bacon cooks, prepare the pasta according to package instructions. Drain and set aside.
  8. Once the bacon is cooked and crisp on each side, use tongs to remove it from the pan. Leave 2 tablespoons of bacon grease in the pan, and add the garlic. Cook for about 60 seconds.
  9. Increase the heat to medium and gradually add in the flour, whisking constantly.
  10. Temper the half and half by heating it in the microwave for 30 seconds. Add the half and half to the skillet and increase the heat to medium-high, stirring constantly. Once it starts to lightly bubble, decrease the heat to low.
  11. Slowly sprinkle in the Parmesan cheese, stirring as you do so.
  12. Once well-combined, add the tomatoes, spinach, and red pepper flakes. Cook for a few minutes until the tomatoes have softened slightly. Use a silicone spatula to gently mix in the penne.
  13. Slice the chicken into strips and place it back in the pan, over the pasta. Sprinkle the top with bacon, and serve!

NUTRITIONAL INFORMATION

Calories: 688, Fat: 34g, Saturated Fat: 15g, Cholesterol: 67mg, Sodium: 741mg, Potassium: 511mg, Carbohydrates: 65g, Fiber: 3g, Sugar: 3g, Protein: 27g, Vitamin A: 2285%, Vitamin C: 13.9%, Calcium: 524%, Iron: 2.4%

Olive Garden Stuffed Chicken Marsala

This Olive Garden Stuffed Chicken Marsala Recipe from cooking plus homedecor is easy to make at home with the exact recipe from the restaurant itself!

Olive Garden Stuffed Chicken Marsala

What is Chicken Marsala?

Well, Marsala is a dark and sweet dessert wine that is pretty close to sherry. So of course, cooking chicken in a Marsala wine sauce gives us, (you guessed it), chicken Marsala.

What Kind of Marsala Wine Should I Use?

Dry Marsala is best when making savory dishes such as this one.

Marsala Substitutes

  • For a non-alcoholic Substitute: 1/4 cup of white grape juice + 1 Tablespoon vanilla extract + 2 Tablespoons Sherry vinegar.*
  • Madeira Wine
  • Dry Sherry (not cooking sherry.) or, 1/2 Dry Sherry 1/2 Sweet Vermouth
  • 1/4 cup dry white wine + 1 teaspoon Brandy *

*The portions of the above substitutions would need to multiplied to equal the 4 cups of Marsala wine that is used in this recipe.

What to Serve with Stuffed Chicken Marsala

  • Instant Pot Roasted Potatoes
  • Instant Pot Mashed Potatoes
  • Smashed Red Potatoes
  • Salad with Copycat Olive Garden Salad Dressing
  • Roasted Carrots, Green Beans, or Broccoli
Olive Garden Stuffed Chicken Marsala 2

Servings

4

Olive Garden Stuffed Chicken Marsala

Prep Time

25 MINS

Cook Time

45 MINS

Total Time

1 HR 10 MINS

Author

Zeeshan

Course

MAIN COURSE

Cuisine

ITALIAN

INGREDIENTS

  • 4 boneless skinless chicken breasts
  • 3/4 cup all-purpose flour
  • Salt/Pepper to taste
  • ½ cup olive oil

Stuffing

  • ½ cup smoked shredded cheese provolone or gouda or if not available use cheddar cheese.
  • 8 oz. mozzarella cheese shredded
  • ¼ cup Parmesan cheese grated
  • ½ cup Plain breadcrumbs Can
  • 1 teaspoon fresh garlic minced
  • 1 tsp red pepper flakes
  • 2 Tablespoons sun-dried tomatoes patted dry and roughly chopped
  • 3 green onions thinly sliced
  • 3/4 cup sour cream

Sauce

  • 1 yellow onion sliced into strings
  • 4 cups Dry Marsala Wine
  • 8 oz. heavy cream
  • 12 oz. button mushrooms thinly sliced

Instructions

  1. Combine all stuffing ingredients together in a bowl and set aside.
  2. Preheat the oven to 350 degrees.
  3. Butterfly the chicken by slicing the side of the thickest part of each chicken breast to create 2 lobes.
  4. Lay the chicken down, covering the top with wax paper. Pound it gently until it’s thinned to 1/4 – 1/2 inches thick.
  5. Fill each of the chicken breasts with the stuffing, try not to over-stuff, you may have some leftover stuffing. Coat the outside of each chicken breast with salt, pepper, and then the flour.
  6. Heat the olive oil in a large skillet over medium high heat. Place each chicken inside of the skillet and cook until each side is a nice golden-brown color.
  7. Remove the chicken and place it in a baking dish. Bake it for 15-20 minutes, or until the inside is cooked through.
  8. Within the skillet where the chicken cooked, add the onions and scrape up the chicken drippings, letting the onions cook in them for about 2 minutes. Add the mushrooms and continue to Sautee until the onions are translucent, about 5 minutes.
  9. Deglaze the pan by adding the wine and bringing it to a light bubble. You’ll want the wine to reduce by half. As you continue to cook the sauce and as the onions caramelize, the sauce will continue to get more and more brown and delicious.
  10. Temper the heavy cream by heating it in the microwave for 20 seconds. Slowly pour it into the pan and bring it to a light bubble, reduce the heat to low and heat for 5 more minutes, then remove it from heat.
  11. Once the sauce is rich and brown, serve it over the chicken and with mashed potatoes!

NUTRITIONAL INFORMATION

Calories: 1424, Fat: 69g, Saturated Fat: 28g, Cholesterol: 215mg, Sodium: 1041mg, Potassium: 1227mg, Carbohydrates: 78g, Fiber: 4g, Sugar: 25g, Protein: 61g, Vitamin A: 1725%, Vitamin C: 7.8%, Calcium: 946%, Iron: 4.2%

SPATCHCOCK CHICKEN IN SPICY YOGURT SAUCE

This roast spatchcock chicken in spicy yogurt sauce has a very juiciest meat and crispy skin.It dish is prepared within 45 minutes.

SPATCHCOCK CHICKEN IN SPICY YOGURT SAUCE

This spatchcoked chicken in spicy yogurt sauce does just that! Its lively, spicy flavours paired up with creamy sauce satisfies the need for warmth and luscious velvety smooth goodness we all long for on a cold night.

I was debating whether to roast this chicken whole or spatchcock it and finally decided on the latter as I was after a quick dinner and a maximum crispness of the skin! Did you know that cooking your chicken open flat like a book cuts your cooking time in half?

If you are intimidated by the process, don’t be! I have handy photo collage to guide you through it and detailed instructions in the recipe card below.

SPATCHCOCK CHICKEN IN SPICY YOGURT SAUCE 3

When I set out to create this recipe I wanted a chicken recipe that was reminiscent of summer barbecues, and to my utter joy I achieved just that! How did I do it? Well I double-sauced it!

First I marinated it for an hour in a very simple marinade but with an addition of smoked paprika that created an allusion the chicken had been grilled. And later I smothered it in a spicy yogurt sauce that gave that charred look we absolutely adore in the summer.

SPATCHCOCK CHICKEN IN SPICY YOGURT SAUCE 4

Because the chicken is spatchcocked not only does cook faster, it also cooks more evenly, so you don’t end up with juicy legs and dry breasts. The chicken comes out juicy on the inside with crispy and flavourful skin. What’s not to love?! Just add a simple salad and maybe some couscous, hello easy side dish, and you are ready to roll! Tempted? I hope so!

SPATCHCOCK CHICKEN IN SPICY YOGURT SAUCE 5

Spatchcoked Chicken in Spicy Yogurt Sauce

Preparation Time
15 minutes
Cook Time
45 minutes
Total Time
1 hour
Course: Main
Serving: 4-6

Author: Zeeshan

Ingredients

  • 3-4 lbs whole chicken

For the Marinade

  • 2 garlic cloves
  • 1/2 lemon juice of
  • 1 tsp salt
  • 1 tsp smoked paprika
  • 3 tbsp olive oil

For the Spicy Yogurt Sauce

  • 250 ml/ 1 cup plain yogurt full fat
  • 1 garlic clove minced
  • 1 tsp smoked paprika
  • ½ tsp cayenne pepper
  • ¼ tsp chilli flakes
  • 3 tbsp parsley chopped
  • 1 tsp fresh lemon juice
  • salt to taste

Instructions

  • To spatchcock a chicken place it breast side down and with a sharp knife or kitchen scissors cut along one side of a backbone then repeat with the other side. Remove the backbone and turn the bird the cut side down. Place the palm of your hand on the chicken breast and push down firmly to flatten it. Tuck the wing tips under the breasts to avoid burning. (See the photo guide in the post) Use the backbone to make a chicken stock or discard.
  • Mix the marinade ingredients together in a small bowl or measuring cup and pour of the spatchcocked chicken, let it marinade for one hour in the refrigerator.
  • Meanwhile preheat the oven to 450F/220C or 440F/200C on fan setting.
  • Mix the ingredients for the spicy yogurt sauce in a small bowl and refrigerate until needed.
  • When the chicken is finished marinating, cook the chicken in the preheated oven for 30 minutes. Then take out and smother with 3-4 tbsp of the spicy yogurt sauce, cook for 15 minutes longer until the skin is crispy and the temperature of the thickest part of the breast reads 150F/66C.
  • Serve with the remaining spicy yogurt sauce.

Restaurant Style Tandoori Chicken

Tandoori chicken is undoubtedly the most popular chicken appetizer recipe from Indian cuisine and it has got its reason for being there! It is absolutely delicious!

TANDOORI CHICKEN
TANDOORI CHICKEN

It is a super favorite chicken recipe of my family and mine too. I can name it as the “king of kebabs” and that is not an exaggeration! Tandoori chicken is best made with the full chicken leg i.e. the drumsticks joint with the thigh. This is undoubtedly the tastiest part of chicken thanks to its high fat content and the tandoori marinate penetrates really well into the nooks & crannies of drumsticks & thighs. The meat of this portion is juicy and soft which creates a killer stuff once the tandoori chicken is grilled. 

Restaurant Style Tandoori Chicken 2

Restaurant Style Tandoori Chicken 3

To make the restaurant style tandoori chicken you would need to ensure that you marinate the chicken in the spice infused yogurt for at least 4 hours or preferably overnight; this is totally non-negotiable if you want the best flavor of tandoori chicken. The yogurt softens the chicken while marinating and helps penetrate the flavors of the spices deep into the meat which eventually translates into best tasting tandoori chicken you would have ever made or tasted. Also, make sure to use hung curd for best possible result with your tandoori chicken. Hung curd is nothing special. To make your hung curd, tie the curd tightly in a muslin cloth and squeeze out all water, then hung it overnight to let all excess water drip off leaving you with the thick & creamy curd. If you do not use hung curd, the marinate will contain too much water diluting the flavors of the spices; plus, the marinate wont stick to the chicken nicely resulting into a not-so-good tandoori chicken which no one desires.

Tandoori chicken demands a significant quantity of Kashmiri red chili powder which not only adds flavor but also add bright red color. While choosing the Kashmiri red chilli powder, make sure you use the authentic stuff which doesn’t not contain much heat; otherwise your tandoori chicken will turn out to be too hot to handle! Now, to enhance your tandoori chicken from homemade to restaurant style, you will have to add a bit of red food color which will lend a chique look to your already tasty tandoori chicken! That vibrant red color is the USP of this flagship recipe of tandoori chicken and if you use organic food color which is available these days in the market, there is nothing to worry about. We always consume some food colors and what not while eating out, don’t we? So, don’t be intimidated by food color in the list of ingredients; it’s perfectly fine!

This tandoori chicken recipe is fail-proof and I can guarantee you that! I have made this tandoori chicken at home uncountable times and it had never disappointed me. So, I blindly can tell you that it’s gonna surely impress your friends and family and you will be the star of the show!  Just look at those gorgeous tandoori chicken pieces and tell me honestly – aren’t you already tempted? I have actually started salivating even looking at these pictures! Okay, let’s focus! Tandoori chicken is also great for outdoor barbecue parties. The charcoal grill will infuse a beautiful smoky aroma to the chicken pieces which may be little difficult to replicate in your indoor oven. I made my tandoori chicken in my trusty oven though and to get the charred effect on the edges, I broiled the chicken for last 4 to 5 minutes. Do keep an eye while broiling as it may burn quickly if not pulled out on time. Enjoy!

Restaurant Style Tandoori Chicken 4

Tandoori Chicken 

Prep time

30 mins

Cook time

1 hour 20 mins

Total time

1 hour 50 mins

Author

Zeeshan

Serves

6 Servings

Ingredients

  • Full chicken legs – 6 (1.5 kg)
  • Kashmiri red chilli powder – 2 tbsp
  • Lemon – 1
  • Oil – 2 tbsp
  • Ginger paste – 1 tbsp
  • Garlic paste – 1 tbsp

Tandoori marinade:

  • Hung yogurt/Greek yogurt – ½ cup
  • Kashmiri red chilli powder – 2 tbsp
  • Kasoori methi (Dry fenugreen leaves) – 1 tbsp
  • Garam masala – 2 tsp
  • Roasted cumin powder – 2 tsp
  • Coriander powder – 2 tbsp
  • Vegetable oil – 4 tbsp
  • Red food color (optional) – 4 to 6 drop but totally depends on the texture and quality of the color you are using
  • Salt to taste
  • Chat masala – ½ tsp
  • Oil or melted butter for basting

Instructions

  1. To make hung yogurt, tie the plain yogurt in a muslin cloth and hang it over a bowl or kitchen sink for 2 to 3 hours so that all the water drips out and you are only left with the thick yogurt.
  2. Wash and pat dry the chicken pieces thoroughly so that no moisture is left. Make multiple incisions on them so that the marinade can go deep inside.
  3. There are two marinates for this recipe. Prepare the first marinade by mixing together 2 tablespoons of Kashmiri red chilli powder, juice of 1 lemon, ginger-garlic paste and 2 tablepoons of oil.
  4. Massage this marinate into the chicken pieces making sure to go deep inside the incisions you had made. Set aside for 30 minutes.
  5. Prepare the second marinate in the meantime with the ingredients listed under Tandoori marinade. In a bowl, combine the hung yogurt, chilli powder, roasted cumin powder, coriander powder, garam masala, kasoori methi, oil and salt to taste and whisk thoroughly so that all the spices blend well. Finally add the red food color and give a vigorous mix since it takes time to mix food color thoroughly.
  6. Take the chicken legs out of the first marinate after 30 minutes. Now rub the second marinade on them again making sure that it goes inside the incisions. Coat all the pieces with a thick layer of marinade. Cover with a cling film and keep inside the refrigerator for at least 4 hours or preferably overnight (8 to 12 hours).
  7. Preheat the oven to 220 C/425 F. Line a baking tray with aluminum foil and place a grill rack on top of the baking tray. Place the marinated chicken on this grill rack.
  8. Now place this grill rack with the chicken at the middle level of the oven and place the lined baking tray below to catch all the drips. Bake the chicken for 35 to 40 minutes. Then take the grill rack out, turn the chicken over and broil for another 35 to 40 minutes or until the chicken is all cooked through. Keep checking after every 15 minutes since it may take less time if you are using lesser quantity.
  9. Baste them with oil or melted butter after every 10 minutes. You can’t skip the basting as it would prevent the chicken from turning dry. [You can even grill the chicken on an outdoor grill on high heat for almost same duration.]
  10. After about 80 minutes, check if the chicken is done – there should not be any traces of pink and the juices should run clear and a toothpick could be inserted very smoothly without any resistance from meat. If you have a food thermometer, check if the temperature registers at least 165 F when inserted into the thickest part of the leg. If yes, your tandoori chicken is done!
  11. Move the grill rack with chicken at the top-most level of your oven and turn on the broil mode which is nothing but directing the heat from top as it gives the authentic charred effect to the chicken and adds some smokiness to it. Broil the chicken for 2 minutes each side always keeping an eye on them as it may burn pretty quickly.
  12. Take them out and let the chicken rest for 5 to 10 minutes before serving. Then sprinkle some chat masala on top and serve your yummy tandoori chicken with lemon wedges and coriander-mint chutney.

FINGER LICKIN’ BUTTER CHICKEN

This is a butter chicken which you can make it in your home with simple ingredients.Taste of this dish is more tasty than that of a good restaurant butter chicken.Believe me that it is too tasty.

FINGER LICKIN’ BUTTER CHICKEN

I have made this recipe easy and I try to make the preparation method easy so that you people can follow it easily and i have made a slight change in the recipe to make it easy without compromising on the taste of this dish.

FINGER LICKIN’ BUTTER CHICKEN 2

So about that BUTTER chicken.My butter chicken recipe doesn’t contain that much butter. And I used what’s called ghee (also known as clarified butter).If you prefer to use regular butter, I suggest you use a mix – ½ butter + ½ oil because butter can burn super easy.

This recipe is super simple. No need for you to grab whole spices and grind them up. I skip them and replace it with tandoori masala. Just follow the step by step directions, and you’ve got creamy butter chicken right at home that’s better than your favorite Indian take-out. It’s a combination of spices all blended together and it’s perfect for this restaurant-style butter chicken.

FINGER LICKIN’ BUTTER CHICKEN 3

It’s all about that sauce when it comes to an authentic butter chicken recipe. No really. Like with most curries, this butter chicken actually tastes better with time . Make the gravy portion of this recipe, blend it and allow it to cool completely before popping it in the refrigerator for 24-48 hours. Let those flavors really get together.

FINGER LICKIN’ BUTTER CHICKEN 4

You can also marinate the chicken in the ginger, garlic, yogurt, and tandoori masala and let it sit for 12-24 hours, covered in the refrigerator. The yogurt, ginger, and garlic really help make the chicken more tender. As always, I’m a fan of white meat chicken, so I used boneless skinless chicken breasts, but you could go the dark meat route and use chicken thighs as well. Some may even tell you it’s more flavorful that way, I’m not one of those people though. ???

Also, with a little weekend prep work, this recipe can be made weeknight friendly. Just make the sauce (and freeze it beforehand) and marinate the chicken on Sunday and pull it together in about 20 minutes on a Monday. That’s faster than ordering take-out and trust me, it tastes better too.

If there’s any recipe that’s worth making at home, it’s butter chicken. AM I RIGHT? I could eat this all week long. And yes, I’m going to say with confidence that this is the BEST butter chicken recipe you’ll ever make. A big thank you to all those that have tried it/loved it/commented/added it to your dinner rotations. <– Let me make the directions a little more clear and the recipe a little easier to follow for you!

FINGER LICKIN’ BUTTER CHICKEN 5

FINGER LICKIN’ BUTTER CHICKEN

YIELD

5 SERVINGS

Delicious restaurant-style butter chicken made right at home with simple ingredients. This recipe is exactly how they make butter chicken in restaurants — and i’ve had people tell me it’s actually better! Trust me when I say it’s finger lickin’ good!

INGREDIENTS

CHICKEN MARINADE:

  • 1 lb. boneless chicken breast, cut into 1 ½ inch cubes (see notes)
  • 2 tablespoons tandoori masala 
  • 1 teaspoon EACH: ginger paste and garlic paste (I used Gourmet Garden)
  • ½ cup yogurt
  • 1 tablespoon oil

BUTTER CHICKEN SAUCE:

  • 2 tablespoons ghee (clarified butter) (see note)
  • 1 large onion, thinly sliced
  • 1 ½ teaspoon EACH: ginger paste and garlic paste (I used Gourmet Garden)
  • 1 (14.5 ounce) can crushed tomatoes
  • 1 teaspoon chili powder (see notes)
  • 1 1/2 tablespoon coriander powder
  • 1 1/2 teaspoon cumin powder
  • 1/2 cup heavy whipping cream
  • 1/2 teaspoon garam masala
  • ¼ teaspoon dried fenugreek leaves (crushed between fingers)

DIRECTIONS:

CHICKEN:

  1. In a medium bowl, combine the tandoori masala, ginger, garlic, and yogurt. Whisk until smooth, adjust seasonings to preference. Add the chicken and allow to marinate for at least 20 minutes and ideally for 12-24 hours, covered in the refrigerator.

BUTTER CHICKEN SAUCE:

  1. Heat the ghee in a dutch oven or heavy bottom pot over medium heat. Add the onions and sauté until they turn translucent and start to sweat, about 5-7 minutes, don’t allow the onions to brown. Add ginger and garlic paste and let cook for 30 seconds, stirring so it doesn’t burn. Add the can of crushed tomatoes along with the chili powder, coriander powder, and cumin powder and continue to cook for 5 minutes, if the mixture starts bubbling rapidly, add about ¼ cup of water and continue to cook.
  2. Remove from heat, add the mixture to a blender and blend until smooth, you may need to add a couple water to help it blend (up to ¼ cup).  Depending on how powerful your blender is, you may want to blend the mixture in two batches. Remember to hold the lid of the blender down with a kitchen towel when blending, to avoid accidents.
  3. MAKE AHEAD OPTION: At this point you can cool and refrigerate the sauce for 24-48 hours (or freeze it for up to 3 months), it will help blend the flavors even more, just remember to bring the sauce back to room temperature (use the microwave) before proceeding with the recipe OR you can continue on with the recipe immediately.

ASSEMBLY:

  1. Heat the remaining tablespoon of oil in the dutch oven over medium heat. Add the marinated chicken (discard any excess marinade) and cook for about 5-6 minutes, stirring as required to brown all sides. Add the butter chicken sauce to the pot and heat everything through. Once it starts to bubble, add the cream and garam masala. When the sauce regains a simmer, add the crushed fenugreek leaves. Serve over basmati rice or with naan.

NOTES

  1. Fan of dark meat chicken? You can replace the cubed chicken breasts with cubed boneless, skinless chicken thighs for more added flavor.
  2. GHEE: If you can’t find it you replace it with 1 tablespoon butter and 1 tablespoon oil.
  3. TANDOORI MASALA: is available in powder/ paste form. I prefer the powder but some of my readers recommended Patak’s brand tandoori paste. You’ll need about 2-4 tablespoons of the paste (to preference).
  4. CHILI POWDER: optional! If you prefer milder food, you may want to leave it out as the tandoori masala already has heat. Traditionally, a spicy pepper similar to cayenne is used. If you can’t find Indian or Pakistani chili powder (usually sold at Indian stores), replace it with cayenne. 1 teaspoon can be a lot so if you prefer a milder flavor, replace with 1/4 – 1/2 teaspoon.

White Barbecue Chicken

This White Barbecue Chicken is sure to become a new crowd favorite at all of your cookouts this winter.

white barbecue chicken

Today we’re sharing our recipe for White Barbecue Chicken. The chicken comes out super juicy and so flavorful!

We started by mixing up a double batch of the White Barbecue Sauce – and then used some of the sauce as a marinade for the chicken.

white barbecue chicken 2

Once the chicken marinated for about four hours, we were ready to grill. I should note here that you do want to brush off any excess marinade before grilling because the sauce will burn before the chicken fully cooks through. But don’t worry – once the chicken is tender and juicy, you’ll brush on more of that white barbecue sauce toward the end of the cooking time, giving this White Barbecue Chicken more of that fantastic zesty flavor!

white barbecue chicken 3

We also served our White Barbecue Chicken with more sauce on the side – dabbing a little bit on the grilled, caramelized skin. The zesty flavors in the creamy sauce together with the grilled chicken are absolutely fantastic!

P.S. This recipe works equally as well with chicken wings or other chicken pieces as it does with bone-in chicken breasts.  Enjoy!

White Barbecue Chicken

  •  Prep Time: 4 hours 15 mins
  •  Cook Time: 35 mins
  •  Total Time: 4 hours 50 minutes
  •  Yield: 4 breasts

INGREDIENTS

  • 4 cups White Barbecue Sauce, see recipe below
  • 4 large skin-on, bone-in chicken breasts (ours were almost a pound each)
  • ¼ cup olive oil
  • ½ teaspoon kosher salt
  • ¼ teaspoon freshly ground black pepper

INSTRUCTIONS

  1. Prepare a double batch of the White Barbecue Sauce, recipe . Use two cups as the marinade and reserve one cup to cook the chicken and one cup to serve on the side.
  2. Place the four breasts in a gallon zip lock bag with two cups of the White Barbecue Sauce and marinate four hours or overnight.
  3. Heat grill to high.
  4. Remove chicken from bag and discard marinade. Rinse the chicken and pat dry with paper towels.
  5. Brush three tablespoons of olive oil over the skin and sprinkle with the salt and pepper.
  6. Place skin down on the hot grill and cook two to three minutes just to give grill marks. Brush the back side with the remaining oil and flip. Cook two minutes.
  7. Move the chicken to an upper rack or a cooler side of the grill, skin up and lower the temperature to medium. The internal grill heat with cover closed should hover around 425 degrees F.
  8. Take the one cup of White Barbecue Sauce and brush a small amount onto the tops of the breasts. Cover grill and wait five minutes. Brush again and again close the lid and time five minutes.
  9. Do this one more time. (Each time you do this, the sauce cooks into the chicken and eventually the tops get crispy and caramelized.)
  10. After the final sauce goes on, cover the grill and cook another 10-20 minutes or until the internal temperature reaches 155 degrees F, using a probe thermometer. Total cooking time should be about 30 minutes but your time may vary based on the size of the breast.
  11. Remove to a platter, brush a little of the remaining sauce on top and let rest five minutes.
  12. Serve with the reserved cup of White Barbecue Sauce.

White Barbecue Sauce

Have you ever tried White Barbecue Sauce?

Its zesty, creamy and fantastic!

white barbecue sauce

White Barbecue Sauce is a zesty, tangy mayonnaise-based sauce that gets a great kick of flavor from the addition of vinegar, horseradish and mustard, plus minced fresh garlic and coarsely ground black pepper.

white barbecue sauce 2

The original recipe calls for Creole mustard – but we weren’t able to find it locally so we swapped in a zesty whole grain mustard instead. (The sauce was still wonderful!) You can find Creole mustard online.

Although we stayed fairly true to the original recipe below, I would imagine you could have some fun with this White Barbecue Sauce recipe – varying the type of vinegar used, swapping in different mustards, and even adding in different seasonings if you’d like! (The original recipe also added in a quarter-cup of water to their White Barbecue Sauce, but we liked a thicker consistency so we left it out.)

White Barbecue Sauce

Yield

2 cups

Prep Time

 5 mins

Total Time

5 mins

Author: Zeeshan

INGREDIENTS

  • 1½ cups mayonnaise
  • ¼ cup white wine vinegar
  • 1 tablespoon coarsely ground black pepper
  • 1 tablespoon whole grain mustard (or Creole mustard)
  • 1 teaspoon kosher salt
  • 1 teaspoon granulated sugar
  • 1 tablespoon fresh garlic, finely minced
  • 2 teaspoons prepared horseradish

INSTRUCTIONS

  1. Place all ingredients in a small bowl and whisk to combine.
  2. Use in place of any red barbecue sauce.

Nutritional Facts

Serving Size 1 tablespoon Serves 32

Amount per serving

calories 75

% daily value *

Total fat 12%

saturated fat 1.2 g
trans fat 0g
Polyunsaturated Fat 4.7g
Monounsaturated Fat 1.8g 0 %

Cholesterol 4.5mg 2%

Sodium  141 mg 6%

Total Carbohydrate 0.5g 0%

Dietary Fiber 0.1g 0 %
Sugars 0.2g

Protein 0.2

Filipino Chicken Adobo

Filipino chicken adobo is the Philippines national dish and its so delicious and healthy that it can become your one of the favorite chicken dish.Ingredients needed to prepare this dish are easily available and are used in everyday cooking . It’s an effortless recipe that yields juicy, tender chicken coated in a sweet savory glaze with little pops of heat from peppercorns.

This is a chicken thigh recipe and it MUST be made with thighs – no substituting with chicken breast!

Filipino Chicken Adobo

Filipino Chicken Adobo

What you need

Filipino Chicken Adobo is the national dish of the Philippines and like all traditional dishes, there are many variations – including different proteins like pork and beef.

Fundamentally though, the key ingredients are the right balance of soy sauce, vinegar, black pepper and sugar that create an incredibly sticky glaze that has a depth of flavor like it’s been slow cooked – but it’s not!

Filipino Chicken Adobo ingredients
  • boneless skinless chicken thighs – cannot substitute with breast, need the fat to transform sauce into a glaze;
  • soy sauce – all purpose or light soy sauce. NOT dark soy sauce (bottle will be labelled as such if it’s dark soy sauce);
  • white vinegar – just everyday, plain white vinegar. Sub with any clear vinegar, including rice wine, apple cider, sherry vinegar;
  • onion and garlic;
  • peppercorns – or coarse cracked pepper;
  • sugar – brown best, white ok;
  • bay leaves – fresh or dried, not the end of the world if you don’t have; and
  • green onion – optional garnish

How to make Filipino Chicken Adobo

And here’s how to make it. Basically, you marinate the chicken briefly, sear the chicken, then simmer it in the pan with the marinade for 25 minutes. It will look watery right up until the last few minutes, then all of a sudden, the liquid transforms magically into a syrupy glaze!

How to make Filipino Chicken Adobo

What Chicken Adobo tastes like

The glaze of Filipino Chicken Adobo is savoury and sweet with a hint of tang, with a distinct soy flavour. The garlic and onion creates a savoury base along with the bay leaves, and the peppercorns add little subtle pops of heat.

Don’t be afraid of the peppercorns in this! The spiciness is tempered from both the cooking time and the strength of the flavour of the sauce so it becomes a flavour enhancer rather than fiery spiciness.

And finally, the chicken itself. It’s incredibly tender, owing to the cook time. Chicken thighs only take about 6 to 8 minutes to cook on the stove, so simmering them in sauce for 25 minutes yields thighs that are so tender inside, it’s like you’ve slow cooked them for hours.

Filipino Chicken Adobo

What to serve with Chicken Adobo

Rice to soak up the sauce is essential! Though if you’re counting calories, I can highly recommend Cauliflower Rice – pictured in the first photo in the post alongside Smashed Cucumbers for a seriously delicious dinner plate clocking in at a grand total of just 415 calories.

You may not use all the sauce this Filipino Chicken Adobo recipe makes. It is quite strong, so have a taste before dousing your entire plate with it.

PS If you do have leftover sauce, don’t throw it out! . I use it to make Filipino Chicken Adobo fried rice – just fry up cooked rice with chopped up pieces of this chicken, some chopped Asian greens and the sauce. The sauce is so flavoursome that you don’t need anything else!

Filipino Chicken Adobo

Servings

4

Prep

10 mins

Cook

35 mins

Marinating

20 mins

Total: 45 mins

 One of the most amazing Asian chicken thigh recipes I have ever come across. Intense in flavour, but so fast and easy to prepare! Chicken is so tender, it’s like it’s been slow cooked.

Ingredients

CHICKEN AND MARINADE

  • 750g / 1.5 lb chicken thigh fillets , boneless and skinless (5 – 6 pieces) (Note 1)
  • 3 garlic cloves , minced
  • 1/3 cup (85ml) soy sauce , ordinary all purpose or light (not dark soy sauce, Note 2)
  • 1/3 cup + 2 tbsp white vinegar
  • 4 bay leaves (fresh) or 3 dried

FOR COOKING

  • 2 tbsp oil , separated (vegetable, canola or peanut)
  • 3 garlic cloves , minced
  • 1 small brown onion , diced
  • 1 1/2 cups (375 ml) water
  • 2 tbsp brown sugar
  • 1 tbsp whole black pepper (sub 2 tsp coarse cracked pepper)

SERVING:

  • 2 green onions/scallions , sliced (garnish)

Instructions

  • Combine Chicken and Marinade ingredients in a bowl. Marinate for at least 20 minutes, or up to overnight.
  • Heat 1 tbsp oil in a skillet over high heat. Remove chicken from marinade (reserve marinade) and place in the pan. Sear both sides until browned – about 1 minute on each side. Do not cook the chicken all the way through.
  • Remove chicken skillet and set aside.
  • Heat the remaining oil in skillet. Add garlic and onion, cook 1 1/2 minutes.
  • Add the reserved marinade, water, sugar and black pepper. Bring it to a simmer then turn heat down to medium high. Simmer 5 minutes.
  • Add chicken smooth side down. Simmer uncovered for 20 to 25 minutes (no need to stir), turning chicken at around 15 minutes, until the sauce reduces down to a thick jam-like syrup.
  • If the sauce isn’t thick enough, remove chicken onto a plate and let the sauce simmer by itself – it will thicken much quicker – then return chicken to the skillet to coat in the glaze.
  • Coat chicken in glaze then serve over rice.

 Recipe Notes:

1. Chicken thighs – do NOT substitute with breast. You need the fat in thighs in order for the sauce to reduce down to a glaze. Can also use bone in thighs, wings or drumsticks (add 3/4 cup water and simmer 30 minutes).The best way to achieve the closest result with chicken breast is to add 2 tbsp of any oil to the sauce, take the chicken out once cooked and reduce the sauce right down to become jammy, then smear it on the breast.

2. Soy sauce – use all purpose or light soy sauce. Do not use dark soy sauce – bottle will be labelled as such if it is. Dark soy is too intense for this sauce once reduced.You probably won’t need all the sauce because it is very strong in flavour. Save the leftovers and use it to make fried rice! It is perfect because it is so strong in flavour so a little bit goes a long way. I used it to make a fried rice with leftover Filipino Chicken Adobo and chopped Asian greens. No other flavourings required!

3. Nutrition per serving, chicken only and assumes all sauce consumed which is unlikely as it’s quite strong. Reduce sodium by using low sodium soy.Make a low calorie dinner plate with a side of Cauliflower Rice and Smashed Cucumbers – total 415 calories for dinner plate (first photo in post)

NUTRITIONAL INFORMATION

Serving: 407g Calories: 350kcal (18%) Carbohydrates: 13g (4%) Protein: 39g (78%) Fat: 15g (23%) Saturated Fat: 3g (19%) Cholesterol: 178mg (59%) Sodium: 1458mg (63%) Potassium: 597mg (17%) Fiber: 1g (4%) Sugar: 7g (8%) Vitamin A: 59IU (1%) Vitamin

C: 3mg (4%) Calcium: 108mg (11%) Iron: 2mg (11%)

CRISPY MAPLE HOT WINGS

Crispy Maple Hot Wings are double fried to make extra crispy and then coated with a blend of maple syrup, butter, and hot sauce. The combination of sweet heat with the crunchy on cooked wings will surely appeal to your taste buds.

CRISPY MAPLE HOT WINGS

Everyone loves a crispy wing, and the double crunch on this recipe will have your friends enjoy this tasty dish .This crispy chicken wings is a perfect addition to any celebration whether there is a party or on any celebrations making you the best cook.

WHY CRISPY MAPLE HOT WINGS ARE PERFECT FOR GAME DAY

It can be the best treat if you plan to enjoy a cricket or football match at your home or at any place.

CRISPY HOT WING – FAQ’S

Why do people love super crispy hot wings so much?

It’s comfort food that tastes delicious! When you coat a slightly salty, super crunchy food with an awesome sauce, you get that satisfaction that makes a person feel good!

Are crispy fried chicken wings healthy for you?

It is all in how you cook them and what particular diet you are on. These wings are double fried to make them super crispy. They are also coated with cornstarch before frying and then coated in a sweet and buttery hot sauce. That makes this recipe one that you should enjoy on special occasions.

What makes these Crispy Maple Hot wings so crunchy?

CRISPY MAPLE HOT WINGS 2

It’s all in the cornstarch and double frying! Coating your chicken with cornstarch prior to cooking gives it a layer that will fry up super crisp. They are also double fried to ensure a crisp texture

How can I keep my chicken wings crispy after cooking?

Whenever any food is hot, covering it up traps the steam which surrounds the food causing moisture to collect around your food. This will make any crispy food soggy. The best solution is to leave the food uncovered and eat it while it is still hot.

Should I use fresh or frozen wings for deep frying?

You can use either. I prefer fresh, but you can buy frozen and thaw them first. Just be sure to pat the wings dry before proceeding with the recipe.

HOW TO MAKE THE BEST SAUCE FOR YOUR CRISPY MAPLE HOT WINGS

  • Use good quality ingredients. I like to buy organic fresh wings when available and use a good quality maple syrup.
  • When making your sauce, heat it up slowly just until it is warm, don’t boil it.
  • If you don’t like maple syrup, the next best choice to add as a sweetener would be honey.
  • Serve beverages that will complement your sauce. Something mild and buttery or crisp and light.
Crispy Maple Hot Wings

RECIPE

CRISPY MAPLE HOT WINGS

Crispy Maple Hot Wings are double fried chicken wings coated in a sweet and spicy sauce

YIELD

6 SERVINGS

PREP TIME

15 minutes

COOK TIME

25 minutes

TOTAL TIME

40 minutes

INGREDIENTS

FOR THE CHICKEN:

  • 3-1/2 pounds fresh chicken wings, rinsed and patted dry
  • 1/2 teaspoon salt
  • 1/2 teaspoon ground black pepper
  • 2/3 cup cornstarch

FOR THE SAUCE

  • 2/3 cup Frank’s hot sauce
  • 1 tablespoon Worcestershire sauce
  • 2 tablespoons butter
  • 1/2 cup pure maple syrup
  • Oil for frying

INSTRUCTIONS

FOR THE WINGS:

  1. Place chicken, salt, pepper, and cornstarch in gallon sized plastic bag (such as a ziploc bag), seal and shake to coat well.
  2. Pout 4 cups of cooking oil in frying pan or pot and bring to 350 degrees or test by dipping a wing into the oil. If it bubbles rapidly, it is hot enough to start frying.
  3. Carefully place the wings one by one into the hot oil and cook for about 12 to 13 minutes, turning over a few times with tongs.
  4. Take the wings out of the oil and shake them off in a strainer. You will likely need to do this in two batches. While second batch of wings are cooking, let the first batch sit and cool. I put my wings in a paper towel lined bowl to drain and cool.
  5. After 2nd batch of wings are removed from the fryer, return the first batch and fry to 10 to 12 minutes until they are golden brown and crunchy. Repeat with 2nd batch of wings.

FOR THE SAUCE:

  1. In a small saucepan, combine hot sauce, worcestershire sauce, butter, and maple syrup. Bring to boil and immediately turn heat down to simmer. Simmer for 3-4 minutes. Add fried chicken with sauce and toss to coat.

NUTRITIONAL INFORMATION

Amount Per Serving: CALORIES: 836 TOTAL FAT: 49g SATURATED FAT: 16g TRANS FAT: 0g UNSATURATED FAT: 31g CHOLESTEROL: 383mg

SODIUM: 1171 mg  CARBOHYDRATES: 32g  FIBER: 0g SUGAR: 17g 

PROTEIN: 63g

Nutrition information calculated provided as a courtesy, but will vary depending on the specific brands of ingredients you use.

Crispy Baked Greek Chicken Wings

You’ll begin with making a marinade for Crispy Baked Greek Chicken Wings which includes quintessential Greek ingredients…olive oil, fresh lemon, garlic and oregano.

baked chicken wings
baked chicken wings

Place the marinade in a gallon size Ziploc with 4 lbs. of chicken wings and let marinate for a couple hours in the refrigerator or overnight when possible.

When they’re ready to be cooked, remove wings from the bag and place them on a baking sheet in a preheated 375 degree oven for 45 minutes.

In the final minutes place them under the broiler for that little extra crisp that makes all the difference.

Watch them turn golden brown, and be sure to check for an internal temperature of 165 degrees.

While the wings are baking you’ll have time to prepare the feta dipping sauce.

The sauce is composed of Greek yogurt, crumbly feta, fresh lemon juice, minced garlic, dried mint and salt.

Place all ingredients in a mixing bowl and whisk until everything is thoroughly incorporated. You can add more or less of certain ingredients depending on your preference. I like the brightness that the lemon juice adds, so I’m pretty generous with it. We also added a little dried mint which is a perfect accompaniment to the savoriness of the wings.

The thing about this feta dip is that it also makes a delicious dressing for salads…

baked chicken wings 2

This dish, highlighting the combination of garlic and oregano with feta, lemon and mint is a lovely example of Greek flavors. And the cool dip against the hot wings is a party all in itself.

CRISPY BAKED GREEK CHICKEN WINGS

Type: Appetizer
Author: Zeeshan

Ingredients

  • 1 cup olive oil
  • 1 cup fresh lemon juice
  • 1 Tbsp. garlic, minced
  • 1 Tbsp. dried oregano
  • 1 Tbsp. kosher salt
  • 2 tsp. cracked black pepper
  • 4 lbs. chicken wings
  • 1 cup Greek yogurt
  • ¾ cup crumbly feta
  • juice of ½ a lemon
  • 2 cloves garlic, minced
  • ½ tsp.dried mint
  • ⅛ tsp. kosher salt

Instructions

  1. Combine first six ingredients in a bowl and whisk to create marinade.
  2. Place the marinade in a gallon size Ziploc with chicken wings and let marinate for a couple hours in the refrigerator or overnight when possible.
  3. Preheat oven to 375 degrees.
  4. When ready, remove wings from the bag and place on a baking sheet.
  5. Cook for 45 minutes.
  6. In the final minutes place wings under the broiler.
  7. Cook until golden brown, and an internal temperature of 165 degrees.
  8. While the wings are baking prepare feta dipping sauce.
  9. Place Greek yogurt, crumbly feta, lemon juice, minced garlic, dried mint and salt in a mixing bowl and whisk until everything is thoroughly incorporated. Transfer to a serving bowl.
  10. Serve wings hot with dipping sauce.