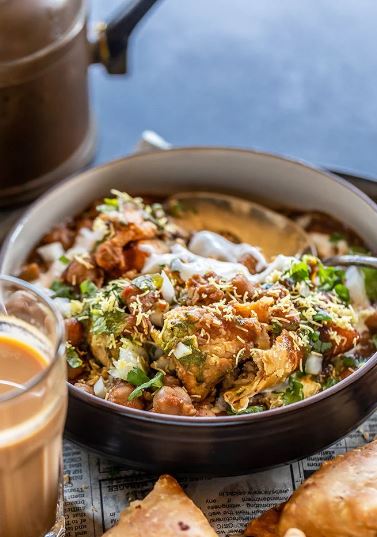
Tangy, spicy Samosa Chaat! Spicy chole (chickpeas) are served with samosa and dollops of yogurt and chutney.
This popular Indian/Pakistani street food is one of my favorite ways to enjoy samosa!
samosa chaat 1
This Samosa Chaat is a another popular Pakistani and Indian chaat where samosa is served with chole (chickpea curry).
Chaat is a broad term used for all Pakistani and Indian street food. It’s mostly spicy, tangy and topped with yogurt and chutneys.
With Ramazan and the festive season around the corner, this would make a great party appetizer!
This Samosa Chaat
✓ is bursting with flavors and texture
✓ has layers of chickpea curry and crunchy samosa
✓ is tangy and spicy
✓ pairs up so well with chai!
The samosa chaat is very easy to put together.
However in order to do, you have to make sure that all the components of the chaat are ready and good to go!
Components of Samosa Chaat
Now, this chaat has several components to it. Let’s see what these are!
Samosa: of course the main ingredients and star of the recipe here. You can either make homemade samosa or get samosa from stores.
I have used my homemade samosa here but totally okay to get them from store.
Especially if you are serving them at a party and running short on time, the short cuts are more than welcome!
Chole: aka the chickpea curry! For this samosa chaat recipe, I used my favorite chole recipe.
It’s literally the best chole and one of my most popular recipes for a good reason.
Yogurt: thick creamy yogurt is an essential ingredients here.
Chutneys: of course no chaat is complete without good chutneys. This recipe calls for cilantro chutney and sweet tamarind chutney.
Extra garnishes: and the chaat is finally topped with sev (fried savory snack), pomegranate arils and cilantro.
It short, it’s an explosion of flavors!
This samosa chaat is best served immediately. Once you have layered everything together, just serve it.
I don’t like soggy samosa in my chaat. No please!
Method
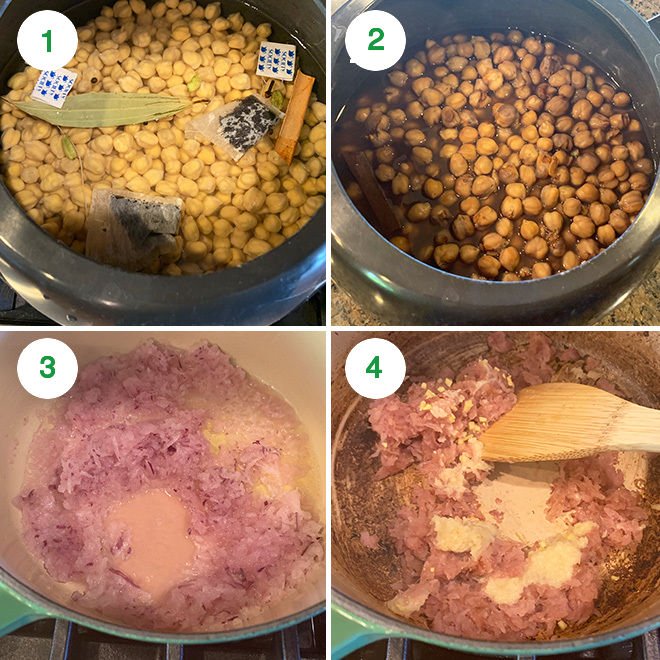
1- Soak dried chickpeas overnight in 4 cups water. In the morning drain the water, and then rinse the chickpeas.
Transfer the chickpeas to a pressure cooker and then add the whole spices- green cardamom, black peppercorn, bay leaves and cinnamon stick.
Also add black tea bags, water (around 4 to 5 cups) and salt. Please note: the tea bags are for giving the chole a dark color. They do not impart any taste to the final product.
2- Pressure cook on high heat for 2 whistles. After that lower the flame to medium and let the chickpeas cook for another 10 to 12 minutes. Remove the cooker from heat and allow the pressure to release naturally.
You should be able to press the chickpeas easily with your fingers once cooked. Set aside.
If using Instant Pot cook for 30 minutes on high pressure with natural pressure release.
3- Start making the masala. Heat oil in a pan on medium heat. Once the oil is hot, add the grated/pureed onions to it.
4- Cook the onions until the raw smell goes away completely. Then add the ginger-garlic paste and cook for 1 minute.
Samosa Chaat step 1
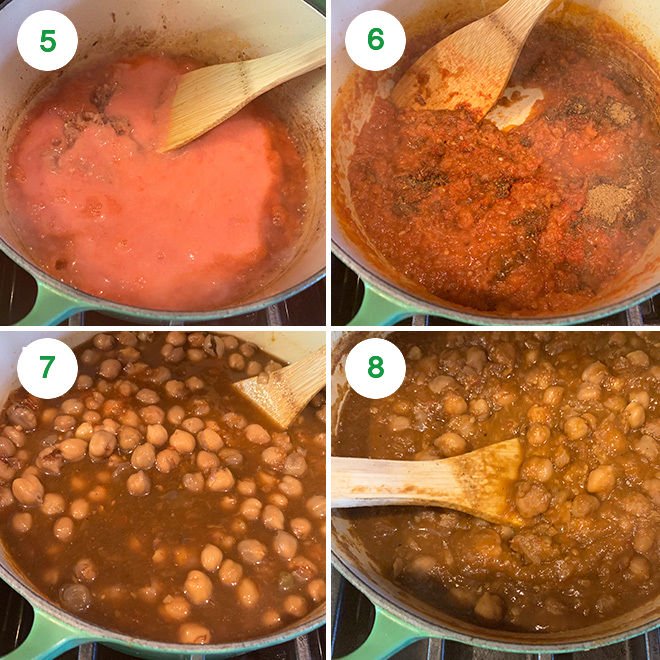
5- Add the pureed tomatoes and mix. Cover and cook the tomatoes for 15 minutes on medium heat, stir once or twice in between. This step is important, so do not rush cooking the tomatoes.
6- Once the tomatoes are cooked, add the chole masala, red chili powder, paprika powder, cumin powder and more salt. Mix and cook the spices for 1 minute.
7- Add the cooked chickpeas into the pan and stir.
8- Cover and let the curry simmer for around 30 minutes on low-medium heat. Again, don’t rush the step for best tasting chole. The curry will thicken considerably and that’s what we want for the chaat.
The curry is now done. Taste test and adjust salt etc. at this point. Let it simmer while you make the tempering.
Samosa Chaat step 2
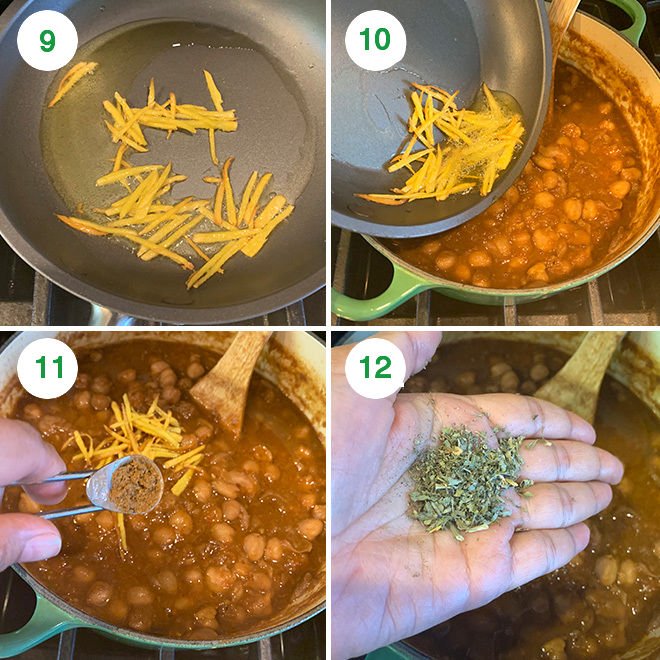
9- For the tempering, heat ghee in a pan on medium heat. Once the ghee is hot, add the ginger julienne to it and fry until it starts turning golden brown in color.
10- Transfer the fried julienne to the curry.
11- Add garam masala and mix.
12- Finally add in the crushed kasuri methi.
Once the chole is ready, gather all other ingredients and start plating the samosa chaat.
Samosa Chaat step 3
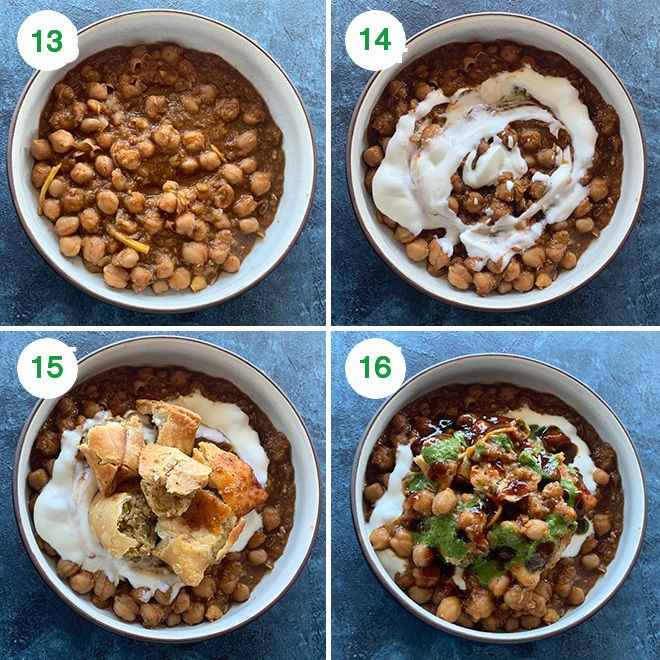
13- To make a plate of samosa chaat, place 1 cup of prepared chole into the serving bowl.
14- Top with dollops of yogurt.
15- Then roughly break 2 samosa and place them on top of yogurt.
16- Top the samosa with more chole, cilantro chutney, sweet tamarind chutney.
Samosa Chaat step 4
And finally garnish the Samosa Chaat with chopped onion, sev, cilantro, pomegranate arils (if using). Sprinkle chaat masala and serve immediately!
how to make samosa chaat
Samosa Chaat
Tangy and spicy Samosa Chaat is popular Pakistani and Indian street food! Crunchy samosa is served with spicy chickpea curry (chole), yogurt and chutneys!
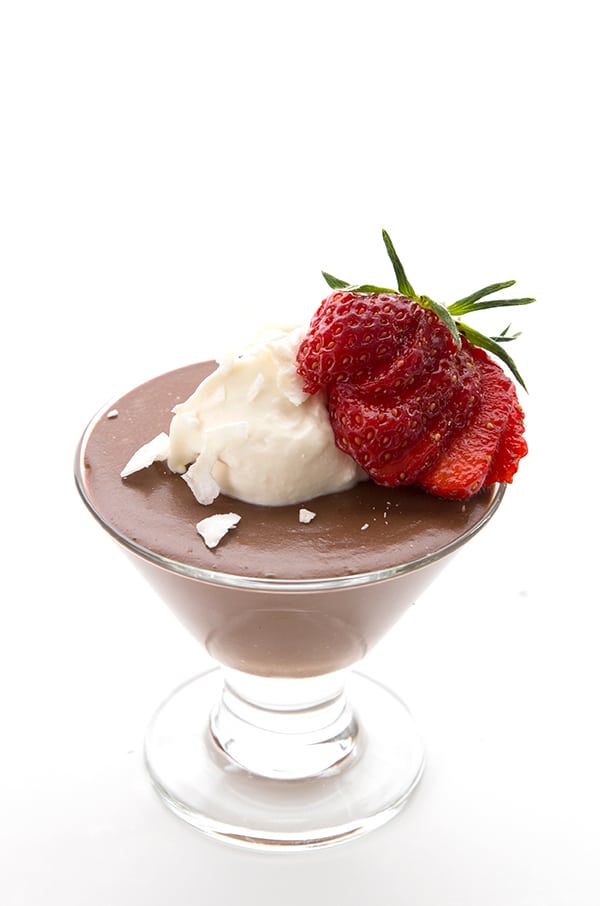
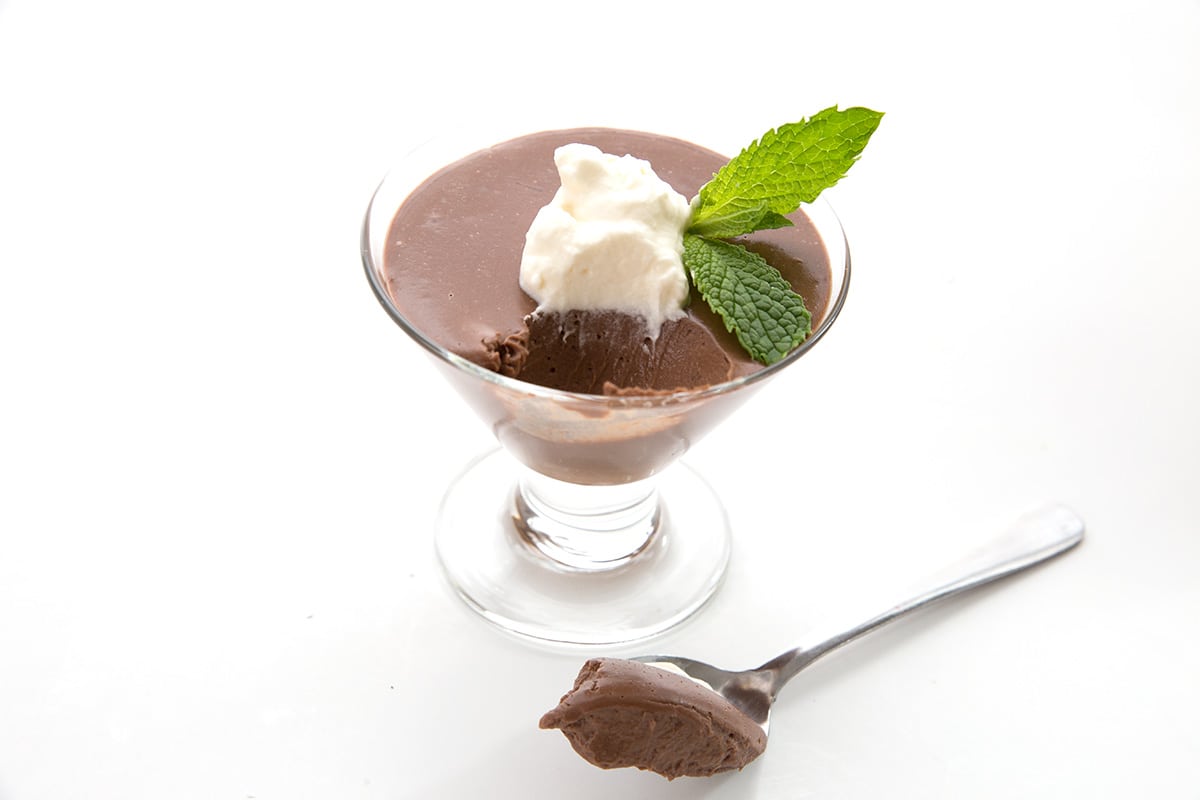
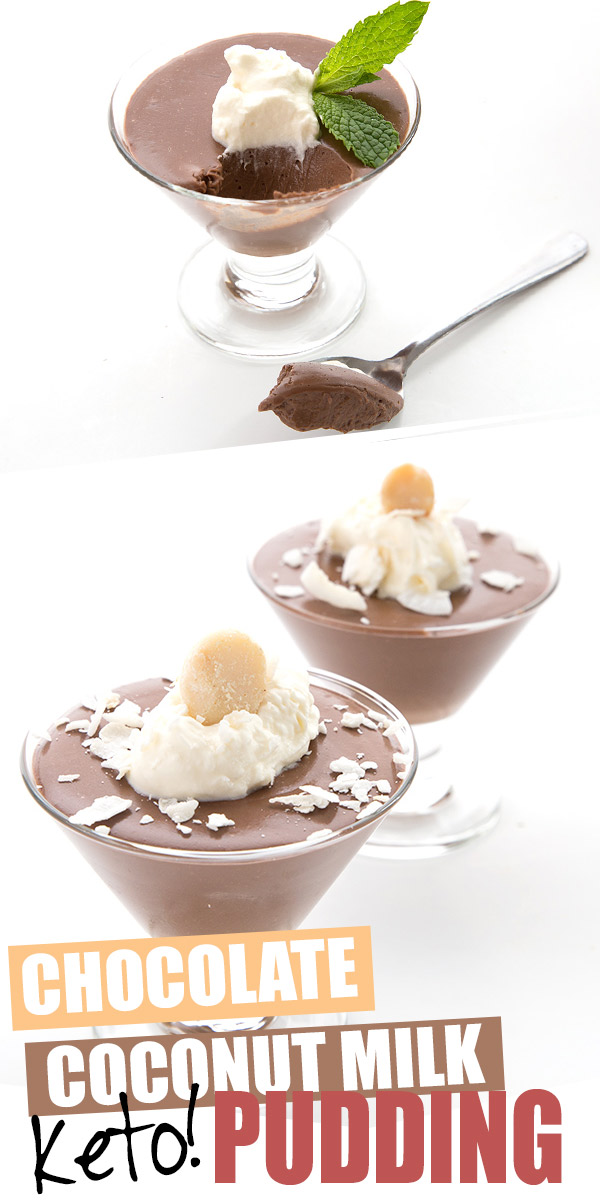
Creamy keto chocolate pudding made with coconut milk. This delicious sugar-free pudding takes only 20 minutes to make and is totally dairy-free. A wonderful low carb dessert the whole family loves. Updated recipe!
CHOCOLATE COCONUT MILK PUDDING 2
HOW TO MAKE COCONUT MILK PUDDING
Use full fat coconut milk. For one thing, this is a keto diet and that fat is healthy stuff! And for another, the thicker version will help the pudding set properly.
Use coconut milk that contains a bit of guar gum, which will also help your keto pudding set properly.
Bring your coconut milk to a full simmer. You don’t necessarily want it to boil but you want it to simmer strongly before moving to the next step.
Properly temper your egg yolks. What does this mean? It’s the process of slowly adding hot liquid to the yolks as you whisk, to bring them up to temperature. This helps ensure that they don’t curdle when you add them back into the pan with the rest of the liquid.
Use good cocoa powder.Have some chopped chocolate in this recipe but just cocoa powder works best. Choose a good quality brand.
Yes, the additional xanthan gum is still necessary to make it thicken up properly.
CHOCOLATE COCONUT MILK PUDDING 3
CHOCOLATE COCONUT MILK PUDDING
Prep Time
2 mins
Cook Time
15 mins
Total Time
17 mins
Chill Time
2 hrs
Servings
6
Calories
228
Creamy keto chocolate pudding made with coconut milk. This delicious sugar-free pudding takes only 20 minutes to make and is totally dairy-free. A wonderful low carb dessert the whole family loves.
Ingredients
1 13.5- oz full fat coconut milk
1/3 cup Swerve Sweetener
3 large egg yolks
1/4 tsp xanthan gum
1/3 cup cocoa powder
3 tbsp coconut oil OR 3 tbsp butter
1/2 tsp vanilla extract
Instructions
In a medium saucepan over medium heat, combine the coconut milk and Swerve. Bring to a simmer, stirring occasionally.
In a medium bowl, whisk the egg yolks until smooth. Slowly add 1/2 cup of the hot coconut milk mixture into the egg yolks, whisking continuously.
Slowly whisk the tempered egg yolks back into the saucepan of hot coconut milk. Reduce heat to medium low and sprinkle with xanthan gum, whisking continuously. Stir in cocoa powder and cook until mixture thickens, about 3 to 4 minutes.
Remove from heat and stir in the coconut oil and vanilla extract until smooth. Divide between 6 dessert cups and refrigerate until set, 2 to 3 hours.
Garnish with lightly sweetened coconut whipped cream, some berries, or some macadamia nuts.
Nutritional Information
Amount Per Serving (1 serving = 1/6th of recipe)
Calories228 Calories from Fat 203% Daily Value*Fat 22.6 g 35%Carbohydrates 4.9 g 2%Fiber 1.8 g 7%Protein 3.6 g 7%
* Percent Daily Values are based on a 2000 calorie diet.
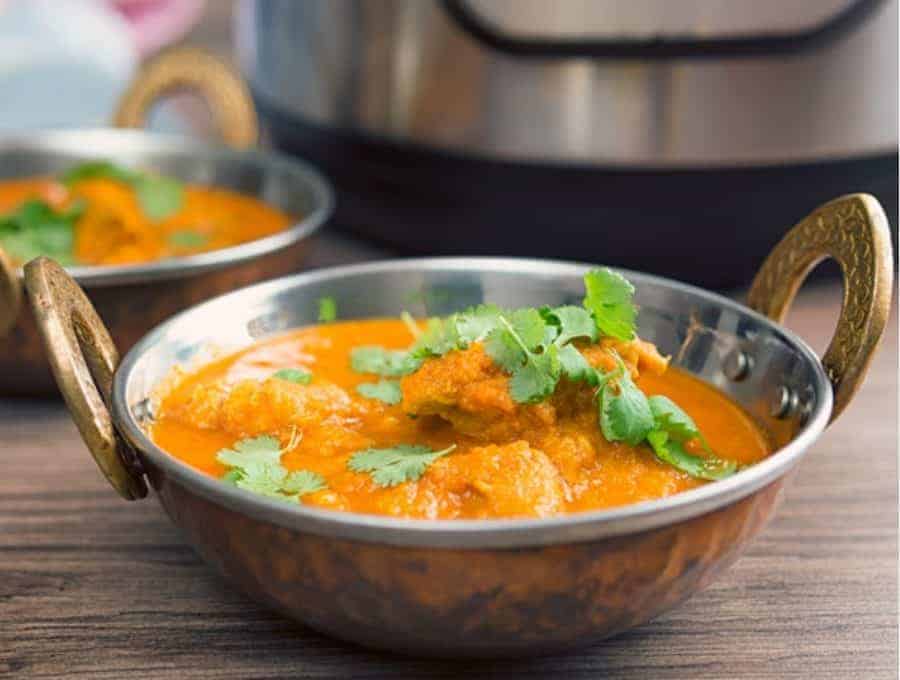
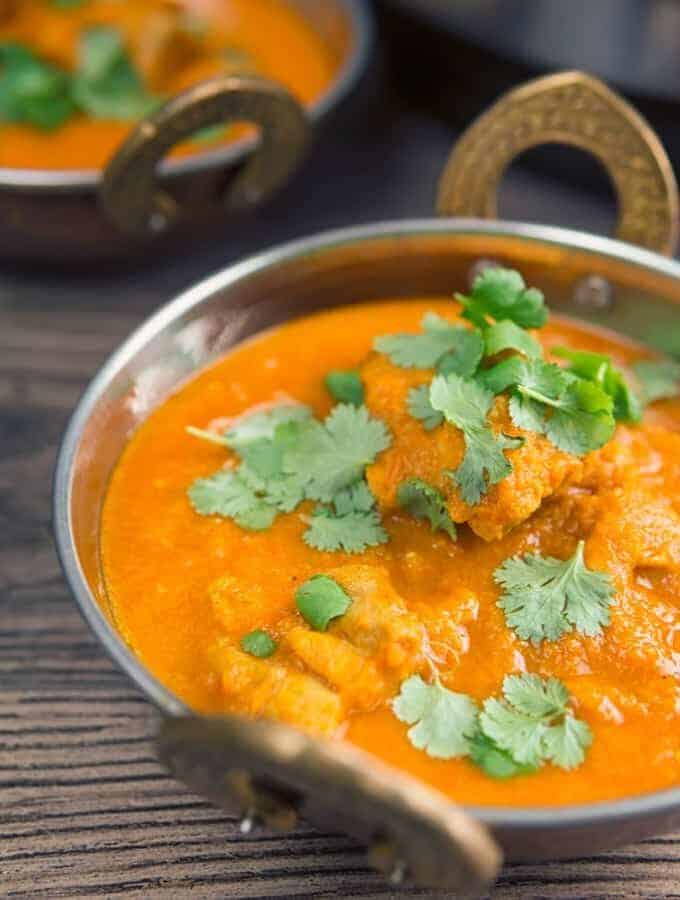
Make an authentic Chicken Vindaloo in your Instant Pot or pressure cooker in minutes rather than hours! It’s easy to make, keto and gluten-free!
CHICKEN VINDALOO
IS CHICKEN VINDALOO SPICY?
If you aren’t familiar with Chicken Vindaloo, it’s a crazy delicious Indian curry dish. It’s absolutely bursting with flavor and it’s definitely an Indian food staple. It is a traditionally spicey dish, but since you’re making it at home you can control just how spicy it is.
The beauty of this homemade Vindaloo is you can adjust the heat to your liking. Personally, I like heat to be in balance with other flavors. In this Chicken Vindaloo recipe, you should taste spice, heat, and a hint of tartness in the back. All the flavors should be in balance, without one taking over another
Accidentally make yours too spicy? No big deal. You can cool your tongue and keep the dish low carb with my Home Made Naan Bread
Now let’s get to cooking…
HOW TO MAKE AUTHENTIC CHICKEN VINDALOO IN THE INSTANT POT
The main issue with making Chicken Vindaloo is you have to brown aromatics first and then grind them together. I wanted a way to not have to do that. Not only does it take a while, but your house also smells of the browning and I don’t always love that.
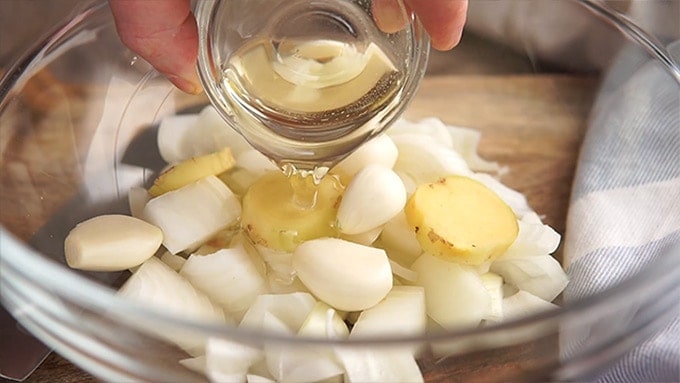
A quick tip! use a paper bowl in the microwave for some of this prep work. Not only it reduce the dishes I had to wash, but my pressure cooker was also free for other things while the aromatics cooked.
1. In a large microwavable bowl, heat the onions, garlic, ginger and oil for 5 -7 minutes until the vegetables are browned on the edges.
chicken vindaloo 2
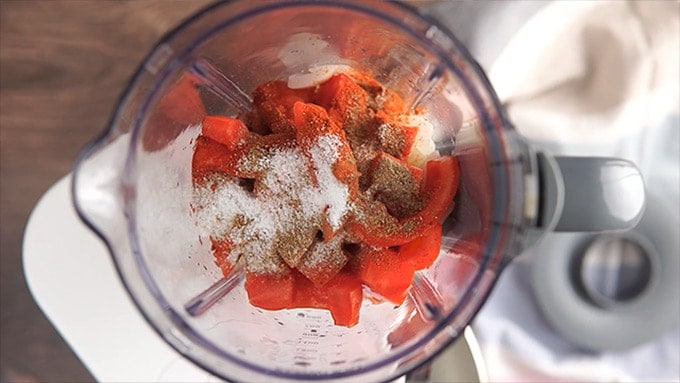
2. Pour veggies into a blender and combine with all other ingredients except turmeric, water and chicken. Blend into a smooth paste.
chicken vindaloo 3
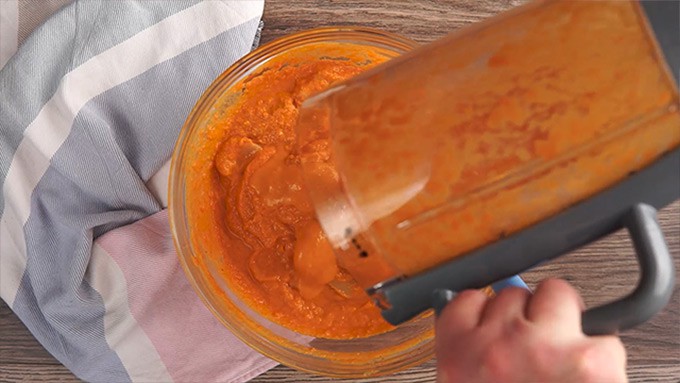
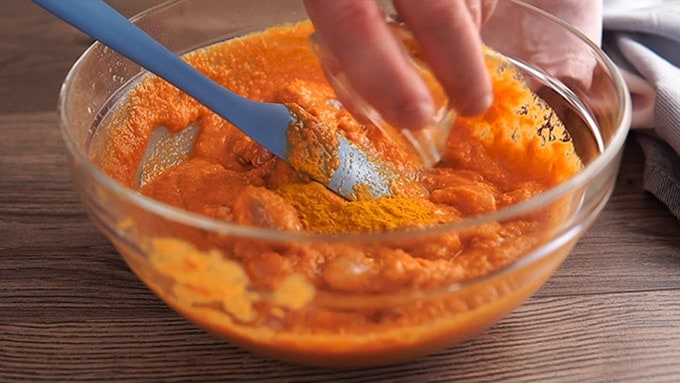
3. Place chicken in a bowl, and coat with the spice and vegetable mixture. Stir well to coat the chicken. Wash out the blender bowl with the 1/4 cup water and pour that over the chicken as well. Mix.
chicken vindaloo 4
4. Add turmeric now (adding it earlier could stain your blender bowl) and marinate for 30 mins to 8 hours.
chicken vindaloo 5
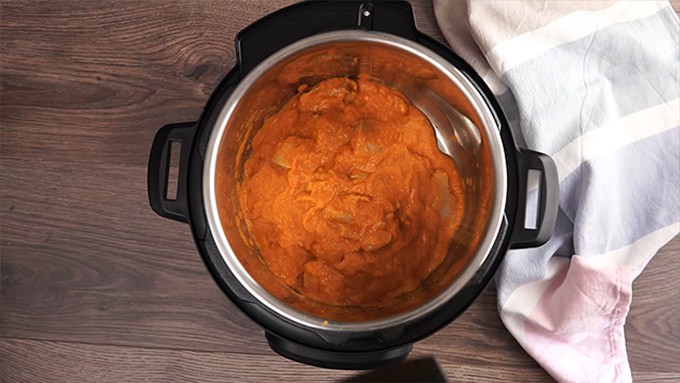
5. Pour the chicken and marinade into your Instant Pot.
chicken vindaloo 6
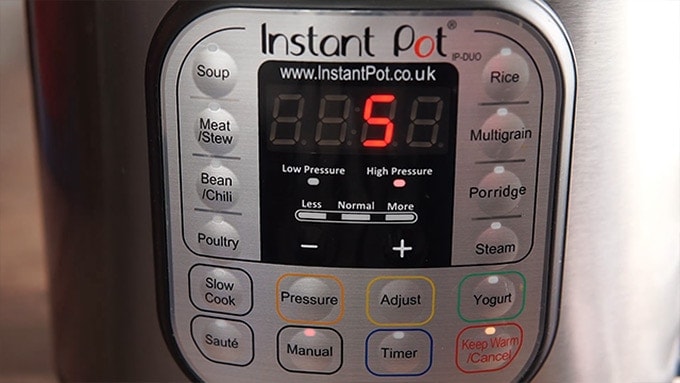
6. Cook on High Pressure for 5 minutes, and allow the pressure to release naturally for 10 minutes. Release remaining pressure.
chicken vindaloo 7
WHY IS VINDALOO CALLED VINDALOO?
Vindaloo (which is also commonly spelled Vindalu) comes from India–via Portugal. The story goes that this is how the Portuguese soldiers who came into Goa preserved meat. Typically, they used wine or wine vinegar, garlic and chilis, all of which help preserve meat in hot climates.
So “carne de vinha d’alhos” got distorted to Vindaloo, and now the world has a great, spicy, piquant dish that you can make to burn off the roof of your mouth. Just kidding!
WHAT DOES CHICKEN VINDALOO TASTE LIKE?
People think every Vindaloo has to be” blow the roof of your head off” spicy, but that’s not actually true. In the old days, people used a lot of cayenne, not just as a taste preference, but also because it helped preserve the meat. You do not need to make Vindaloo super spicy–unless you WANT to.
It’s the same story with the vinegar. An erstwhile preservative, now you can adjust it according to your taste preferences.
What you want in a good Vindaloo, in my opinion, is a good balance of heat, sour, and umami. So you should have a HINT of vinegar come through–but not an overpowering vinegary taste. You’re not trying to make salad dressing here after all ?
WHAT IS IN CHICKEN VINDALOO SAUCE?
Chicken Vindaloo Sauce is slightly smokey, spicy, and tangy. You will need garlic, ginger, white vinegar, tomato, salt, garam masala, smoked paprika, cayenne pepper, coriander, cumin, and lastly, turmeric, added separately.
This may not be like the super-thick restaurant sauces which are created with filler vegetables. It makes a thinner, more flavorful sauce than what you may have been served, but this is actually a more authentic version.
If you want a thicker version, I’d add a few potatoes chopped small, which can then disintegrate into the sauce once lightly mashed.
Do not use cornstarch! Not only is that not traditional, but it is also less flavorful than a chicken vindaloo thickened with potatoes or other cooked vegetables.
HOW DO I MAKE A LAMB OR PORK VINDALOO?
For a Lamb Vindaloo curry, I would suggest cubing leg of lamb. Those cubes will cook under pressure in about 10 minutes, with 10 minutes of natural pressure release. Then, release all remaining pressure.
For a Pork Vindaloo, use cubed pork shoulder. Once again, if you make bite-size cubes, you should cook under pressure in about 15 minutes, with 10 minutes of natural pressure release. Then, release all remaining pressure.
CAN YOU MAKE CHICKEN VINDALOO WITH POTATOES?
Short answer, yes. You can make chicken vindaloo with potatoes. And many people do. I mean, carbs and Indian cuisine traditionally go hand in hand.
TIPS AND TRICKS FOR MAKING CHICKEN VINDALOO
You can make a Pork Vindaloo by using pork shoulder cut into 2-inch cubes. Cook in the Instant Pot for 15 minutes and allow to NPR (natural pressure release) for 10 minutes.
You can make a Lamb Vindaloo by using leg of lamb cut into 2-inch cubes. Cook in the Instant Pot for 10 minutes and allow to NPR (natural pressure release) for 10 minutes.
This Chicken Vindaloo curry Recipe is the perfect make-ahead dish. You could make the sauce in the morning and marinate the chicken. At dinner time, all you would have to do is cook the chicken in the Instant Pot!
You can customize how spicy the Chicken Vindaloo is by adjusting how much cayenne you use.
Make sure to add turmeric last as it may stain your blender when you make the sauce.
So whether you’re a vindaloo fanatic, new to the dish, or are just looking for a quick and delicious Indian dinner option, you’re sure to love this Chicken Vindaloo recipe! Make sure to share this recipe with your friends on Facebook so they can enjoy it as well!
chicken vindaloo 9
Chicken Vindaloo
Make an authentic Chicken Vindaloo in your Instant Pot or pressure cooker in minutes rather than hours! It’s easy to make, keto and gluten free!
In a large microwavable bowl, heat the onions, garlic, ginger and oil for 5 -7 minutes until the vegetables are browned on the edges.
Pour veggies into a blender and combine with all other ingredients except turmeric, water and chicken. Blend into a smooth paste.
Place chicken in a bowl, and coat with the spice and vegetable mixture. Stir well to coat the chicken. Wash out the blender bowl with the 1/4 cup water and pour that over the chicken as well. Mix.
Add turmeric now (adding it earlier could stain your blender bowl) and marinate for 30 mins to 8 hours.
Pour the chicken and marinade into your Instant Pot.
Cook on High Pressure for 5 minutes, and allow the pressure to release naturally for 10 minutes. Release remaining pressure.
Depending on your chicken and how much water it releases, you may need to remove the chicken pieces and evaporate some of the water by using the Sauté function to cook the sauce down.
Use this as your base recipe!
Make a Pork Vindaloo cooking in the Instant Pot for 15 minutes, and 10 minute NPR. Cut pork shoulder into 2 inch cubes.
Lamb Vindaloo can be made in the Instant Pot cooking for 10 minutes, and 10 minute NPR. Cut lamb of leg into 2 inch cubes.
**ADD TUMERIC LAST AS IT MAY STAIN YOUR BLENDER WHEN YOU MAKE THE SAUCE.**
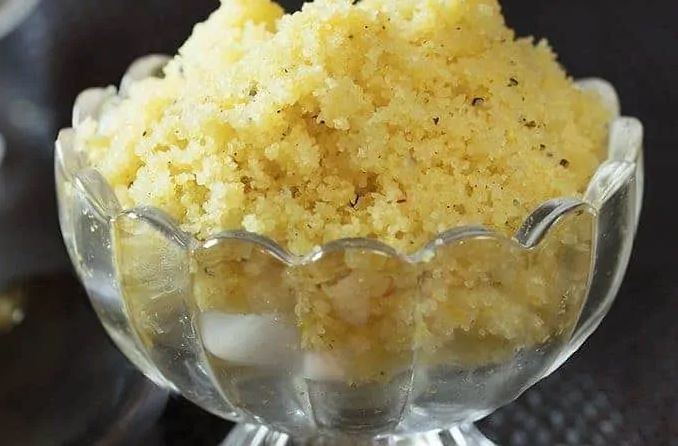
Here’s a simple Pressure Cooker or Instant Pot Halva recipe that will let you make this classic Indian Halva without having to stand, stir, control spatters, and wonder if it’s done yet or not. Whether you call it Halva, sheera, sheero, or kesari, you will agree this simple farina dessert is delicious and when made in a pressure cooker, quite easy.
HOW DO YOU MAKE HALVA?
Okay, it’s actually not that difficult to make stovetop halva–IF.
IF you’ve ever watched it being made, IF you’ve had a family member show you how, IF you’ve eaten vast quantities of it in your life so you know how to tell when it’s done and of course IF you have time to stand and stir and control the adding of water so you don’t get splattered and burn yourself.
Indian Halva 2
HOW IS SOOJI HALVA MADE TRADITIONALLY?
Traditionally, this recipe is made stovetop. First, you roast the sooji or farina. Then you add to it a sugar syrup you’ve prepared, along with lots of ghee and cardamom. Then you cover it and let it cook until done just so.
We’re not making it that way. We’re not going to roast the sooji for starters. This is the part that takes forever. It does make a slight difference to the taste but really, it’s not a huge difference and I’m okay skipping it.
We are also not making a sugar syrup and we are definitely not pouring the hot sugar syrup into hot sooji and watching it splatter all over our stove top and ourselves.
WHERE DO I FIND FARINA?
This is going to be a lot simpler than you think. Either go to the Grocery store and look for sooji. Or go to grocery store and get some Cream of wheat.
Yup. Cream of wheat = Farina = Sooji.
HOW TO MAKE INSTANT POT HALVA RECIPE |INSTANT POT SOOJI HALVA RECIPE
HACK #1
So in this Instant Pot Halva recipe, we are going to combine everything in the right proportions, cook it pot-in-pot, remove it and eat it.
No really. It will be that simple.
HACK #2
The other little hack I used for this was to grind saffron threads rather than soak them in milk, wait for them to soften, and dirty yet another dish to make it.
What you do is that you grind up some saffron with a little sugar in a mortar and pestle. Not only does this make the saffron easier to dissolve, it also stretches that expensive saffron a bit.
Just another way to be #ruthlesslyefficient ?
So to recap, we are making this Instant Pot Halva by mixing up sooji, sugar, water, cardamom, and saffron. And then we are cooking it pot-in-pot for ease and to ensure the right consistency.
Got it?
Let’s make it!
Instant Pot Halva Recipe
Here’s a simple Pressure Cooker or Instant Pot Halva recipe that will let you make this classic Indian Halva without having to stand, stir, control splatters, and wonder if it’s done yet or not. Whether you call it Halva, sheera, sheero, or kesari, you will agree this simple farina dessert is delicious and when made in a pressure cooker, quite easy.
In a small bowl, mix together farina, sugar, cardamom and the saffron-sugar mixture.
Add water and ghee and mix well.
Pour the mixture into the greased pan and cover with a silicone lid or foil.
Pour 1.5 cups of water in the inner liner of the Instant Pot. Place a high steamer rack on top of this. Place the cover pan on the rack.
Set the Instant pot to cook on high pressure for 5 minutes. At the end of the cook time, let the pot sit undisturbed for 5 minutes and then release all remaining pressure.
Using silicone mitts, remove the inner pot. Use a fork or spoon to fluff up the halva and stir it around really well. You’re doing this to spread the cardamom and saffron throughout the halva. As you stir, you will see the grains start to separate, and the halva takes on a yellow-orange tinge from the saffron.
Once the halva has been broken up and the spices are mixed in, the halva is ready to serve.
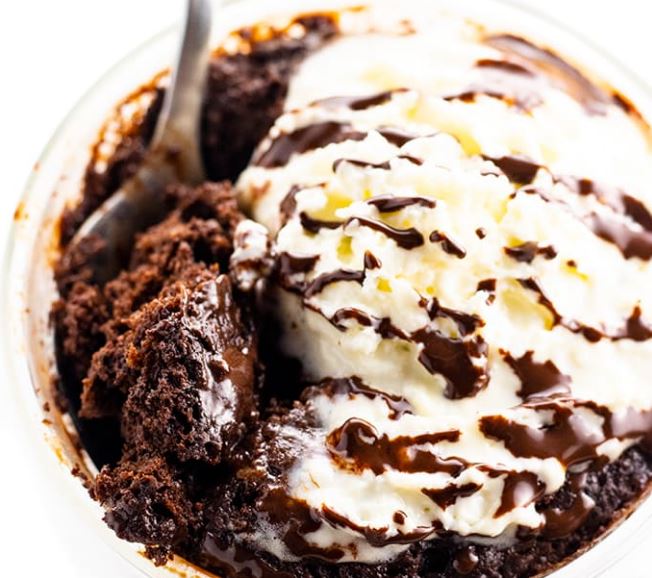
This yummy keto mug cake is also paleo friendly and requires only 6 ingredients. Best of all? It only takes 2 minutes to make!
Net carbs per serving: 4g
LOW CARB PALEO KETO CHOCOLATE MUG CAKE
LOW CARB PALEO KETO CHOCOLATE MUG CAKE RECIPE
See how to make keto mug cake in 2 minutes, using 6 ingredients! This rich, moist, low carb paleo chocolate mug cake recipe has only 4 grams net carbs.
What do you do when you need a healthy dessert like NOW?! Keto chocolate mug cake!!! This easy keto mug cake (seriously, 2-minutes!) will save the day to satisfy all of your chocolate cake cravings. What do I love about this paleo chocolate mug cake? It’s single serving – great for portion control! It’s so rich and chocolate-y – great for those chocolate cravings. And, this low carb chocolate mug cake is made with nutritious ingredients – great news if you want to start your day off with a chocolate breakfast!
The entire recipe for paleo chocolate cake in a mug has only 4 grams net carbs, 1 gram of sugar, a good helping of protein, and even a quarter of your daily iron needs. It’s gluten-free and grain-free, too. With this kind of nutrition info, you can feel good making a meal out of it.
If you’re a chocolate lover like me, though, you have to try this version. It will really hit the spot for that chocolate craving – and fast.
Plus, making low carb chocolate mug cake is incredibly easy. Here, I’ll tell you all about it…
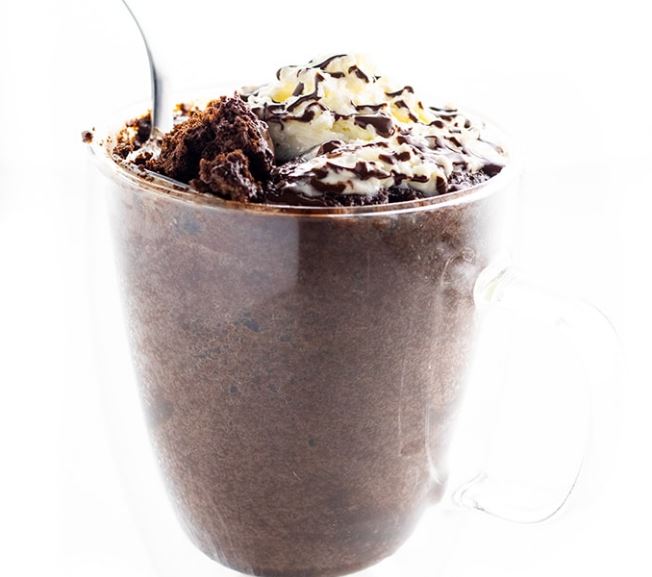
WHAT IS KETO MUG CAKE?
If you haven’t tried a low carb chocolate mug cake yet, you’re in for a treat. It’s moist and chocolate-y, and tastes like a real dessert. And the best part? This easy keto mug cake is ready in just a few minutes!
Keto chocolate cake in a mug is exactly what it sounds like… it’s a single-serve chocolate cake that’s made in a mug! Easy, fast, and made with common ingredients for anyone that likes gluten-free, paleo, or low carb cooking. All you need is salted butter, unsweetened baking chocolate, almond flour (make sure it’s blanched and finely ground!), sweetener, baking powder, egg, and vanilla extract (optional).
Low Carb Keto Chocolate Mug Cake
HOW TO MAKE A KETO MUG CAKE IN THE MICROWAVE
The original recipe for how to make chocolate mug cake uses the microwave, making it ultra fast to prepare. If you prefer the oven, no problem! We’ll cover both ways, so you can decide what is best for you.
Melt the butter and chocolate. You can make your paleo chocolate cake in a mug or in a ramekin, and melt the butter and chocolate right in there.
Mix up the batter. Stir in almond flour, sweetener, baking powder, egg, and vanilla into the ramekin or mug.
Cook. Microwave the mug cake for 60-75 seconds, until just firm.
TIP: This last step is really the only “trick” to the recipe. As long as you don’t overcook your low carb chocolate mug cake, it won’t be dry! You want it to be spring-y, but not dry.
HOW TO MAKE A KETO MUG CAKE IN THE OVEN
You can also bake this paleo mug cake chocolate in the oven too.
Preheat the oven to 350 degrees F.
Melt the butter and chocolate. Melt the butter and chocolate together in a double boiler
Mix up the batter. Stir in the almond flour, sweetener, baking powder, egg, and vanilla.
Bake mug cakes. Transfer batter into ramekins and bake for about 15 minutes.
TIP: You’ll need either a large 12-oz ramekin or two small 6-oz ramekins. Make sure your ramekins are a lot bigger than the volume of the batter (about double the size), because the cake will rise as it’s baking.
There are also some substitution alternatives, depending on your needs.
Keto Mug Cake Without Milk
Unlike many other chocolate mug cake recipes, this one has no milk. Don’t worry – it’s not dry at all! The butter and chocolate in there keep it ultra moist.
Dairy-Free Keto Mug Cake:
If you need the keto chocolate mug cake to be completely dairy-free, you can also replace the butter with ghee or coconut oil. When you substitute one of these, just add a pinch of salt to compensate for the salted butter.
Personally, I prefer grass-fed butter for the best flavor, if that works for you. Many people include it in a paleo diet, as well.
Low Carb Mug Cake Sweetener Options:
Regarding the sweetener, any granulated one will work for this easy chocolate mug cake recipe.
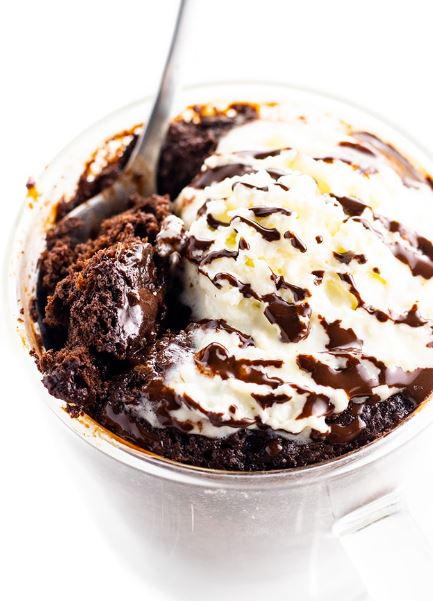
Low Carb Keto Chocolate Mug Cake 2
TOPPINGS FOR PALEO CHOCOLATE CAKE IN A MUG
It’s delicious on its own, but my favorite way to enjoy this delicious mug cake is to add toppings. For the ultimate keto mug cake, top it with
More (sugar-free) melted chocolate
Chopped nuts
Homemade whipped cream – you don’t even need sweetener, but can add some powdered sweetener if you like
Sugar-free keto ice cream
Peanut butter drizzle
HOW TO STORE LOW CARB CHOCOLATE MUG CAKE
If you find yourself with some extra low carb flourless chocolate mug cake (I don’t know how this would happen!), you can store it at room temperature for a day, or in the fridge for 2-3 days.
This keto mug cake recipe is best fresh, but you can store it for a few days.
CAN YOU STORE PALEO CHOCOLATE CAKE IN A MUG?
Yes, you can store these paleo mug cakes right in the mug if you’d like. Seal the top tightly with plastic wrap to avoid drying out.
CAN YOU FREEZE PALEO CHOCOLATE MUG CAKE?
Yes, you can freeze paleo chocolate mug cake. Wrap tightly in plastic wrap and store in the freezer. Let it thaw in the fridge and then re-heat in the microwave or oven until just warm.
TIP: You can add a bit of butter or ghee on top before reheating to keep the mug cake moist.
Low Carb Keto Chocolate Mug Cake 3
TOOLS TO MAKE LOW CARB KETO CHOCOLATE MUG CAKE
Double Walled Insulated Mug Set – Use clear mugs for this keto mug cake chocolate, vanilla, OR cinnamon!
Measuring Spoons – A must for baking.
Easy Whipped Cream Dispenser – You’ll want to top your paleo chocolate mug cake recipe with whipped cream and this gadget makes it easy to have whipped cream at any moment… without chemicals.
LOW CARB PALEO KETO CHOCOLATE MUG CAKE RECIPE
See how to make keto mug cake in 2 minutes, using 6 ingredients! This rich, moist, low carb paleo chocolate mug cake recipe has only 4 grams net carbs.
Prep Time
2 minutes
Cook Time
2 minutes
Total Time
4 minutes
Course
Dessert
Cuisine
American
Calories
433 kcal
Servings
Mug cake
Author
Zeeshan
INGREDIENTS
1 tbsp Butter (salted; *see notes for dairy-free options)
3/4 oz Unsweetened baking chocolate
3 tbsp Blanched almond flour
1 1/2 tbsp ( any granulated sweetener; *see notes for options)
1/2 tsp Gluten-free baking powder
1 large Egg
1/4 tsp Vanilla extract (optional)
INSTRUCTIONS
Microwave Instructions
Melt the butter and chocolate together in a mug or large 12 oz (355 mL) ramekin in the microwave (about 45-60 seconds, stirring halfway through). Be careful not to burn it. Make sure the ramekin is at least double the volume of the ingredients, because the mug cake will rise.
Add the almond flour, sweetener, baking powder, egg, and vanilla (if using). Stir everything well until completely mixed together.
Microwave for about 60-75 seconds, until just firm. (Don’t overcook, or it will be dry.)
Serve with whipped cream (or coconut whipped cream for paleo), and/or drizzle with more melted chocolate stirred with sweetener.
Oven Instructions
Preheat the oven to 350 degrees F (177 degrees C).
Melt the butter and chocolate together in a double boiler on the stove. Be careful not to burn it. Remove from heat.
Add the almond flour, sweetener, baking powder, egg, and vanilla (if using). Stir everything well until completely mixed together.
Transfer the batter to a large 12 oz (355 mL) oven-safe ramekin (or two smaller 6 oz (178 mL) ones). Make sure the ramekins are at least double the volume of the ingredients, because the cake will rise. Bake for about 15 minutes, until just firm.
Serve with whipped cream (or coconut whipped cream for paleo), and/or drizzle with more melted chocolate stirred with sweetener.
RECIPE NOTES
Serving size: 1 mug cake (entire recipe)
For a dairy-free or paleo version, use ghee or coconut oil, and add a pinch of salt.
The original version of this recipe used erythritol, but the monk fruit allulose blend makes a far superior, super moist mug cake. Paleo followers may prefer to use coconut sugar for the sweetener.
NUTRITIONAL INFORMATION PER SERVING
Amount per serving. Serving size in recipe notes above.
Calories 433, Fat 38g, Protein 14g, Total Carbs 11g, Net Carbs 4g, Fiber7g, Sugar 1g
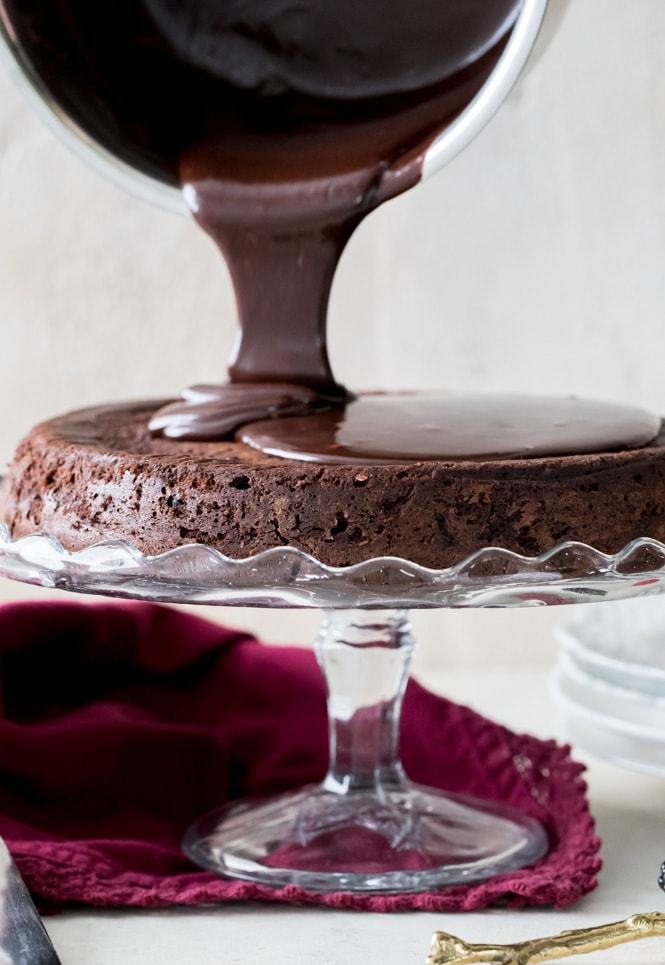
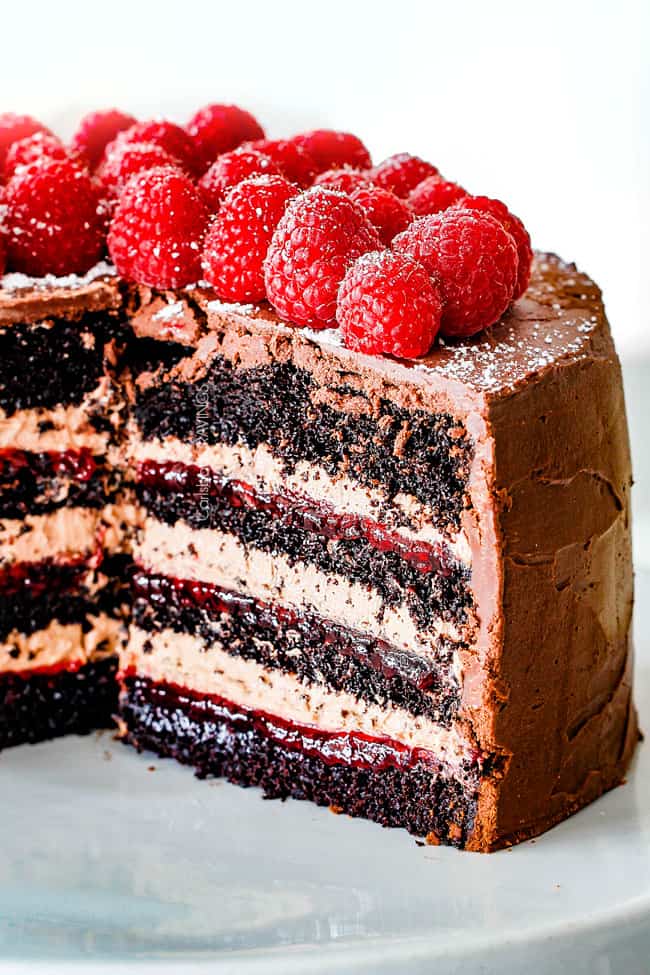
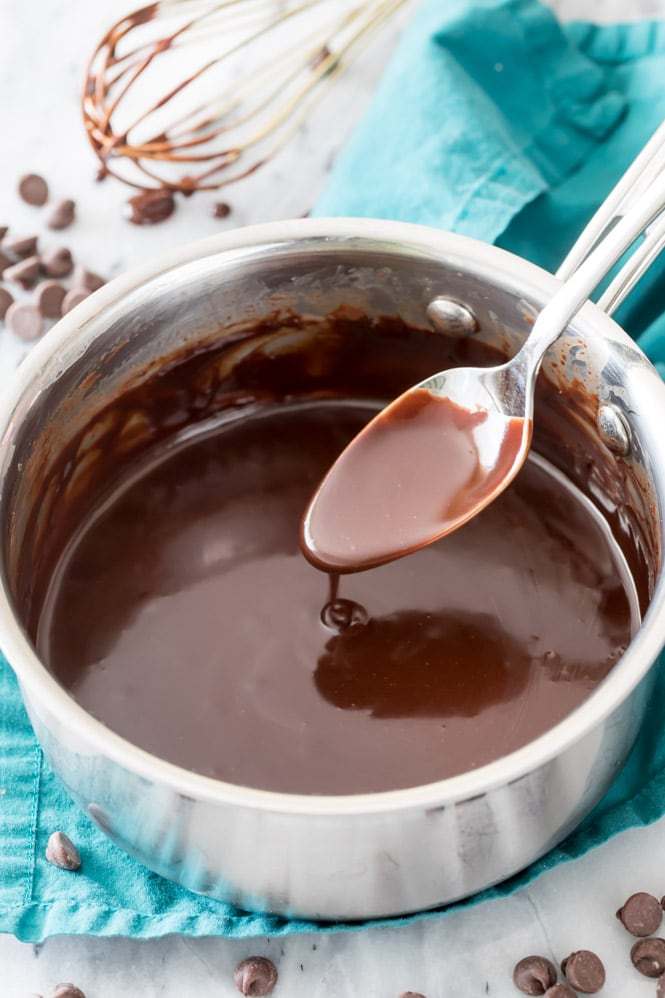
This Chocolate Ganache is silky, creamy, sweet and shiny made with just 4 ingredients. It’s ideal for glazes, frostings, fillings and 1000X better than store bought chocolate sauce. Use this simple ganache to elevate ice cream, brownies, cakes, truffles or anything it touches! I’ve included how to make Chocolate Ganache, How to Store Chocolate Ganache, How to Use Chocolate Ganache and everything in between!
Chocolate Ganache 1
CHOCOLATE GANACHE RECIPE
This Chocolate Ganache Recipe is pure chocolate decadence yet is deceptively easy to make! You only need chocolate, heavy whipping cream, butter, a microwave, and 5 minutes to make this fool proof, easy ganache recipe.
Whether it is Valentine’s Day, bridal or baby showers, birthdays, family movie night, family ice cream night, or simply dessert time, this Chocolate Ganache recipe makes every memory more delicious. We inhale it drizzled on popcorn, enveloping donuts, bathing cakes, smothering ice cream and on and on. What is your favorite way to devour ganache?
Strawberry Cake
WHAT IS CHOCOLATE GANACHE?
Chocolate Ganache (pronounced geh-Nahsh) sounds fancy because the term “Ganache” is French, but it simply means chocolate melted into hot cream. It is a basic pastry component and SO easy.
The resulting Chocolate Ganache is the consistency of a silky chocolate sauce although it becomes thicker, like creamy peanut butter, as it cools making it ideal for truffles, dessert fillings, icings, and whipped frosting.
WHY DO THEY CALL IT GANACHE?
While no one knows the exact origin of Chocolate Ganache, legend claims it comes from a young French student who poured hot cream onto chocolate bits. His tutoring chef called him a “ganache” which means “moron” in old French. His mistake, however, resulted in one of today’s most beloved forms of chocolate.
WHAT IS GANACHE MADE FROM?
Chocolate Ganache is typically made with equal parts chocolate and heavy cream, although the ratio can change depending on the usage. It can also contain butter for added flavor and smoothness, corn syrup for extra shine or alcohol, extracts or spices for flavor.
Chocolate Ganache 3
CAN I MAKE GANACHE WITH OTHER CHOCOLATES?
Absolutely! You can make ganache with any type of chocolate:
White Chocolate Ganache: replace semi-sweet chocolate with white chocolate and use 25% less heavy cream.
Milk Chocolate Ganache: replace semi-sweet chocolate with milk chocolate.
Dark Chocolate Ganache: use semi-sweet chocolate (which is technically dark chocolate) or use part semi-sweet chocolate and part bittersweet chocolate.
Chocolate Ganache 4
CAN YOU MAKE GANACHE WITH HALF AND HALF INSTEAD OF CREAM?
Heavy Cream is always the best option for Chocolate Ganache because the higher the fat content of the cream, the richer and more stable the finished ganache will be. I would only attempt to use half and half if you are using the ganache as a glaze, and not a thicker frosting because the half and half will permanently thin down the ganache. It will also not be as shiny and can easily become grainy when over stirred.
chocolate ganache 5
CAN I SUBSTITUTE MILK FOR CREAM IN GANACHE?
I do not recommend using milk to make Chocolate Ganache. It will produce a thin, less indulgent ganache with lackluster shine and taste and is likely to become grainy.
CHOCOLATE TO CREAM RATIO
In this Chocolate Ganache recipe, basic 1:1 ratio, 8 ounces heavy cream (1 cup) to 8 ounces of chocolate is used.This ratio is used practically for everything in this recipe. It is ideal for sauces, glazes and at room temperature wonderfully spreadable for frosting or fillings.
The only time you should need a thicker ganache is for truffles. In that instance you will want 2 parts chocolate to 1-part cream. You may want a thinner ganache with more cream than chocolate if making a chocolate syrup or sauce that needs to stay runny for an extended period of time.
Chocolate Raspberry Cake
HOW TO MAKE CHOCOLATE GANACHE
Chocolate Ganache is quick and easy to make:
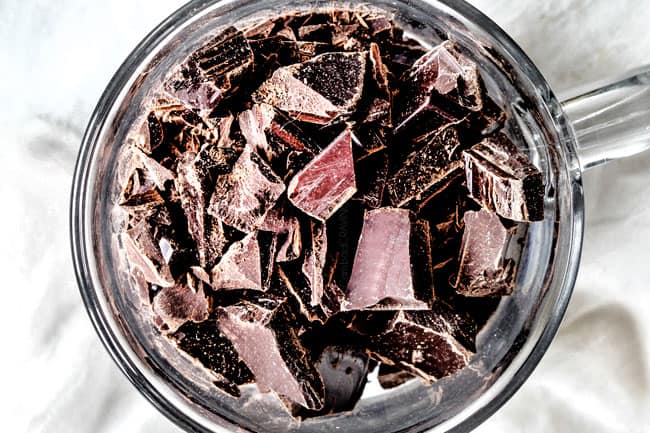
STEP 1: CHOP CHOCOLATE
First, roughly chop your semi-sweet chocolate bar. The pieces don’t have to be uniform but should be on the smaller side so they melt easily.
Your chocolate ganache is only as tasty as your chocolate – so splurge a little and use quality chocolate! I suggest Bakers or Ghirardelli brand chocolate bars. Quality chocolate chips can also work but ONLY use Guittard or Ghirardelli. Other chocolate brands have too many additives and will not melt nicely. Note: 8 oz. chocolate chips is roughly 1 1/3 cups NOT one cup.
chocolate ganache 6
STEP 2: HEAT HEAVY CREAM
You can heat the heavy cream on the stove or in the microwave, but I prefer the easy microwave method.
MICROWAVE: Add heavy cream, butter and corn syrup (if using) to a microwave safe bowl and microwave for 2 minutes or just until simmering and butter is melted. If the butter is not completely melted after 2 minutes, then microwave at 30 second intervals until butter is completely melted.
STOVE TOP: Add heavy cream, butter and corn syrup (if using) to a medium saucepan and heat until butter is melted and the mixture just begins to simmer, stirring occasionally.
You never want to melt your chocolate and cream together unless using a high ratio of corn syrup because the chocolate will scorch.
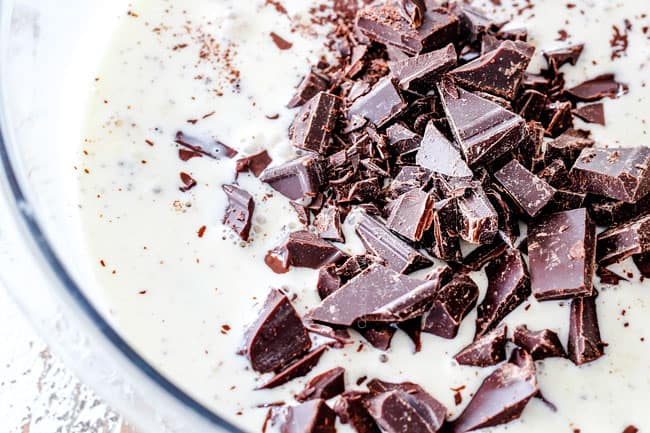
STEP 3: ADD CHOCOLATE
Add chocolate and let the mixture stand for 3 minutes without stirring. This allows the heat of the cream to soften the chocolate while bringing down the temperature of the cream.
If you are over eager and whisk too soon, the heavy cream will be too hot and result in a gritty texture. If this does happen to you, then whisk in 1-3 teaspoons vegetable oil until smooth.
chocolate ganache 7
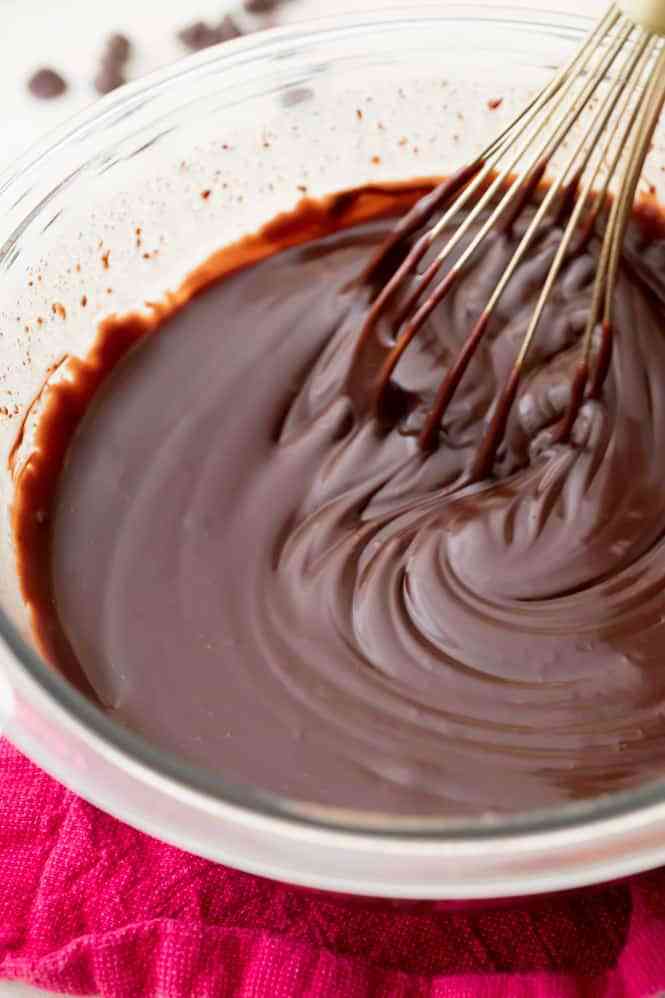
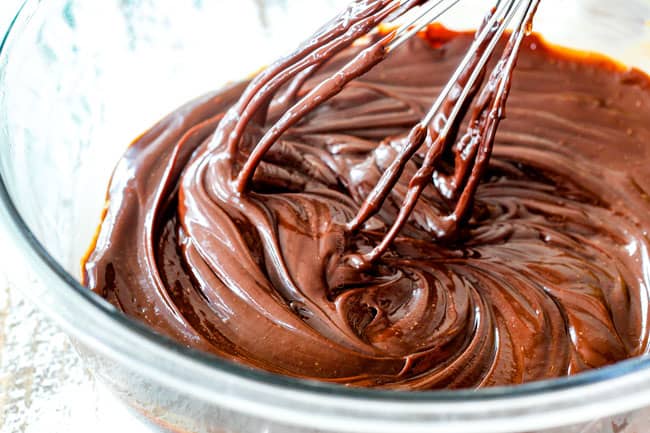
STEP 4: STIR UNTIL SMOOTH
Using a wire whisk, start at the center of the bowl and whisk outward in in a vigorous circular motion to melt the chocolate completely and to achieve thick, glossy ganache. This ensures you are creating an emulsion in which the fat from the cream, butter and chocolate are suspended into the liquid of the cream, resulting in a silky-smooth ganache.
chocolate ganache 8
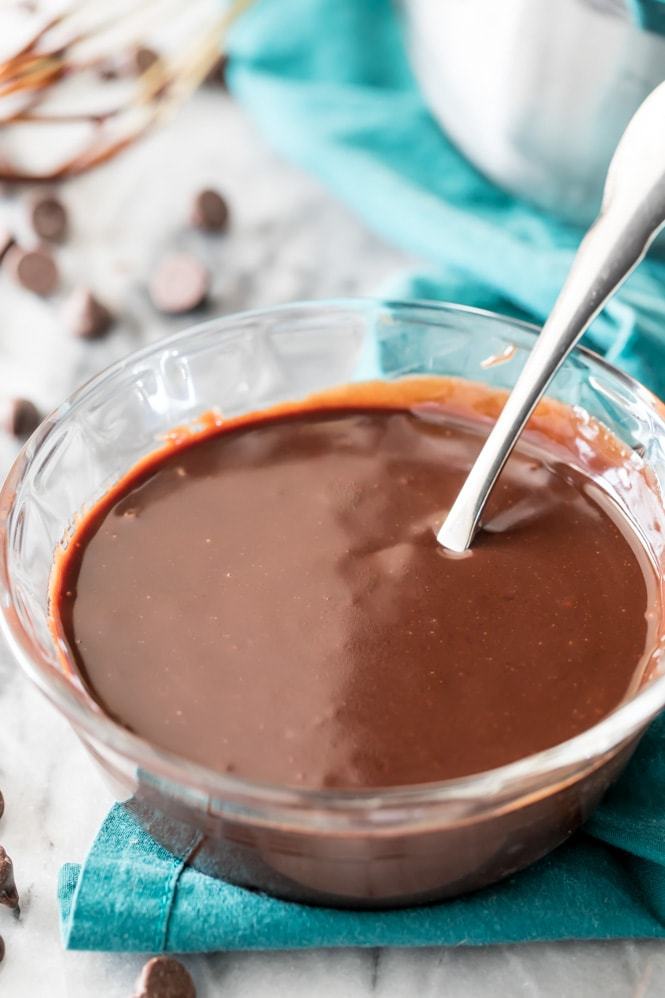
STEP 5: COOL
Cool at room temperature for 10 minutes before using as a sauce or dip or cover with plastic wrap touching the surface of the chocolate and allow to cool and thicken for frosting or piping.
Chocolate Ganache 2
WHY DO YOU ADD CORN SYRUP?
This Chocolate Ganache recipe contains corn syrup for 3 purposes:
To make the ganache extra smooth
Keep the ganache shiny even after being refrigerated
Keep the ganache flexible when it sets
It makes A HUGE difference in the final product. You can omit the corn syrup if you really are opposed but the ganache will not be as smooth, shiny, flexible or overall successful.
HOW DO I THICKEN CHOCOLATE GANACHE?
You will want to use Chocolate Ganache almost immediately for sauces, glazes and dips, allowing it to cool for only about 10 minutes.
If you are using it for anything else, then it will need to thicken either in the refrigerator or at room temperature. So, if you have already made Chocolate Ganache and it seems thin, remember it will thicken upon cooling and be the thickest after refrigerating.
To thicken ganache quickly, cover it with a piece of plastic wrap pressed directly against the top of the chocolate so a film does not form. Chill ganache in the refrigerator until it reaches desired consistency, about 30-60 minutes, depending on usage and quantity and size/depth of container.
You may also thicken the Chocolate Ganache at room temperatures but this will take almost twice as long as the refrigerator.
If you would still like a thicker ganache even after it reaches room temperature, then whip the ganache with a hand or electric mixer for a few minutes so it increases in volume and becomes light brown in color. This will create air pockets like in whipped cream, so it will hold its shape.
DOES GANACHE HARDEN?
If you use the 1 to 1 ratio of cream to chocolate like in this Chocolate Ganache recipe, then your ganache will thicken and set up but not completely harden.
If your ganache becomes thicker than you would like or does harden when refrigerated– don’t worry! You can either let the ganache sit in a warm part of your kitchen for about an hour or add 1 teaspoon vegetable oil and microwave on low for 10 seconds then whisk and microwave another 10 seconds if required until completely smooth.
IS IT SAFE TO LEAVE GANACHE OUT OVERNIGHT?
Yes! Chocolate Ganache is safe at room temperature (not summer temperatures), for up to 2 days. After 2 days, it should be refrigerated.
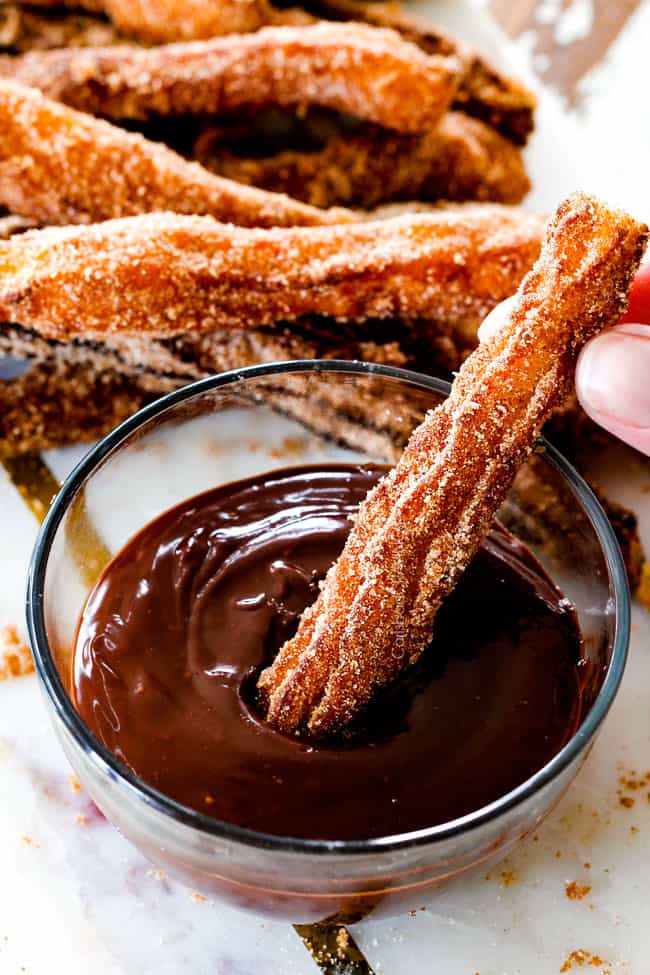
churros
CAN YOU STORE LEFTOVER GANACHE?
Absolutely! Place a piece of plastic wrap directly on the surface of the ganache so its touching. This will stop a sugar film from forming. Store at room temperature for up to 2 days or refrigerate for three weeks.
HOW LONG DOES GANACHE LAST?
When stored properly in an airtight container, Chocolate Ganache can last for:
Room temperature: 2 days
Refrigerated: 3 weeks
Freezer: 3 months
CAN YOU MAKE GANACHE AHEAD OF TIME?
Yes! Chocolate Ganache can be kept at room temperature for up to 2 days.
If it has been refrigerated, then let it come to room temperature before using.
If it has thickened more than your liking at room temperatures or in the refrigerator, then microwave ganache at 50% power, stirring every 10 seconds, until it reaches desired consistency. For a creamier ganache, stir in 1-3 teaspoons vegetable oil when reheating.
CAN YOU FREEZE GANACHE?
Yes, you can freeze Chocolate Ganache for up to 3 months in an airtight container without noticeable change in quality. I would suggest placing a piece of plastic wrap directly on the surface of the ganache so its touching to prevent sugar crystals.
When ready to use, let ganache thaw overnight in the refrigerator then let sit at room temperature for a few hours before serving. You may microwave the ganache at 50% power, stirring every 15 seconds if you still would like thinner ganache.
WHAT IS THE DIFFERENCE BETWEEN GANACHE AND FROSTING?
Ganache can be a frosting, but most frostings are not a ganache. Even most chocolate frostings are not ganache.
Chocolate Ganache is always melted chocolate, heavy cream and sometimes butter and corn syrup. It can be whipped to create a frosting.
Frosting, on the other hand, is a generic term for whipped sugar, butter and milk/heavy cream that is most commonly used to frost cakes. It can also contain other ingredients such as cream cheese, cocoa powder, etc.
WANT TO TRY CHOCOLATE GANACHE RECIPE
Easy Chocolate Ganache made in 5 minutes with just 4 ingredients. Its ideal for glazes, frostings, fillings and 1000X better than store bought chocolate sauce. Use this simple Chocolate Ganache to elevate ice cream, brownies, cakes, truffles or anything it touches!
Prep Time
3 minutes
Cook Time
2 minutes
Servings
cups
INGREDIENTS
1 cup heavy cream
1 tablespoon salted butter
8 oz. semi-sweet chocolate chopped
2 tablespoons corn syrup optional*
1/2 teaspoon vanilla extract optional
INSTRUCTIONS
Add heavy cream, butter and corn syrup (if using) to a medium saucepan and heat until butter is melted and the mixture just begins to simmer, stirring occasionally OR add heavy cream, butter and corn syrup to a microwave safe bowl and microwave for 2 minutes or just until simmering and butter is melted.
Add chocolate and give it swirl so the chocolate is covered. Let stand 3 minutes.
After 3 minutes, vigorously whisk in circular motions until chocolate is melted and completely smooth. Whisk in vanilla if using.
Let ganache cool for 10 minutes before using as a dip or sauce or allow to cool to room temperature for frosting, filling, etc., stirring often. Reheat at 50 % power in the microwave with 1 teaspoon vegetable oil if ganache thickens too much as you work or becomes grainy.
RECIPE NOTES
*DO I HAVE TO USE CORN SYRUP?
This Chocolate Ganache recipe contains corn syrup for 3 purposes:
To make the ganache extra smooth
Keep the ganache shiny even after being refrigerated
Keep the ganache flexible when it sets
Corn syrup makes A HUGE difference in the final product. You can omit the corn syrup if you really are opposed but the ganache will not be as smooth, shiny, flexible or overall successful.
HOW TO STORE GANACHE
Place a piece of plastic wrap directly on the surface of the ganache so its touching. This will stop a sugar film from forming. Store at room temperature for up to 2 days or refrigerate for three weeks. Let refrigerated ganache come to room temperature before using by placing on the counter for 1-2 hours. You can also microwave it at 50% power, stirring every 30 seconds.
HOW TO FREEZE GANACHE:
You can freeze Chocolate Ganache for up to 3 months in an airtight container without noticeable change in quality. I would suggest placing a piece of plastic wrap directly on the surface of the ganache so its touching to prevent sugar crystals.
When ready to use, let ganache thaw overnight in the refrigerator then let sit at room temperature for a few hours before serving. You may microwave the ganache at 50% power, stirring every 15 seconds if you still would like thinner ganache. Stir in 1-3 teaspoons vegetable oil for a smoother ganache.
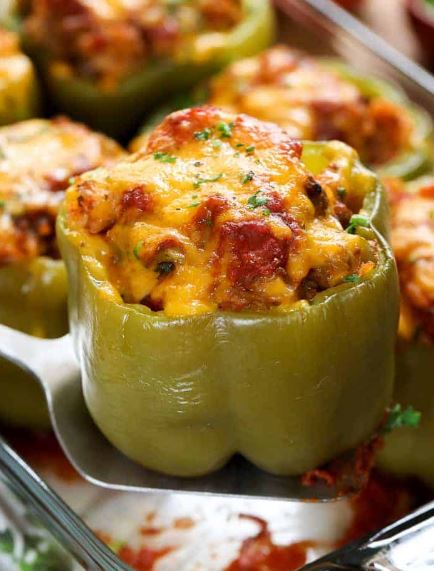
Stuffed Peppers are a fancy way to serve peppers! They are so easy, delicious and impressive enough to serve for special occasions or special guests!
While I often serve peppers in a stir fry or in a fresh Greek salad, I do love using the pepper itself as a serving vessel! We’ve filled these with a delicious beef, sausage and rice filling perfect for a quick and complete meal in one tidy package!
stuffed peppers
Stuffed Bell Peppers are easy to make and everyone loves them! We fill these with a mixture of beef and sausage but you can use one or the other (or even ground turkey if you prefer).
When choosing the color of pepper for your Stuffed Peppers recipe, it will depend on your personal taste preference. Green peppers are a bit more zesty and definitely less sweet than red, yellow or orange. Green peppers in this recipe really compliment the flavors in the beef, sausage, tomato-rice mixture.
Stuffed Peppers 2
How to make Stuffed Peppers
If you follow these easy steps, you will have perfect stuffed peppers every time!
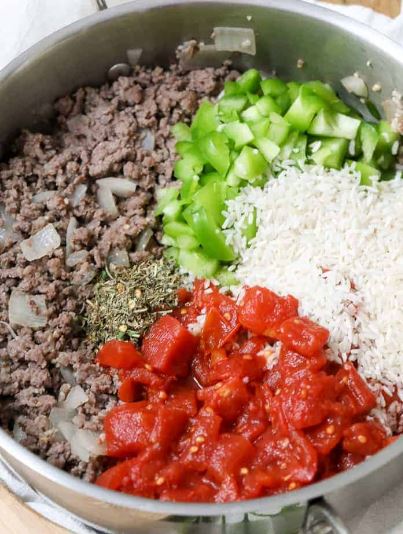
Brown meat and aromatics. Add tomato sauce, rice and seasonings and cook until rice is tender.
While the filling is cooking, prepare your peppers by simmering 5 minutes to soften.
Fill peppers with pasta sauce, meat and rice mixture.
Top with cheese and bake until bubbly!
Do You Have to Pre-cook the Peppers Before Stuffing Them? No you don’t have to precook the peppers, but they do stay quite crisp if you don’t pre-cook them. I personally prefer starting with cooked peppers for this Stuffed Peppers recipe.
How Long to Cook Stuffed Peppers
Stuffed peppers should be cooked at about 350°F for about 45 minutes. Be sure to cover with foil during the initial 30-35 minutes to ensure they do not dry out. Uncover and top with cheese and bake for the remaining 10 minutes or so until brown and bubbly.
Yes, you definitely can freeze Stuffed Peppers and they are a great make-ahead meal! You will need to bake them first, then you can either freeze them individually or together in a baking dish. To re-heat, simply thaw in the fridge overnight and bake in a 350°F oven until heated through.
Keep this Stuffed Peppers recipe close at hand for a quick, easy and fun way to serve dinner! Prepped and ready in under 1 hour, this recipe is great for your busy schedule!
Stuffed Peppers
PREP TIME
30 minutes
COOK TIME
45 minutes
TOTAL TIME
1 hour 15 minutes
SERVINGS
6 servings
COURSE
Main Course
Cuisine
American
AUTHOR Zeeshan
Tender bell peppers stuffed with a zesty beef and rice filling with tomato sauce are baked until bubbly.
Cut the tops off the peppers (reserve the tops), remove seeds and membranes and discard. Chop tops of the peppers to add to the filling.
Bring a large pot of water to a boil and cook peppers 5 minutes. Remove and drain well.
In a large skillet, brown beef, sausage, onion & garlic over medium high heat until no pink remains. Drain any fat.
Stir in the diced tomatoes with juice, rice, 1 1/4 cup water, diced pepper tops, Worcestershire sauce and Italian seasoning.
Bring to a simmer, reduce heat and cover. Cook 15-20 minutes or until rice is tender. You can add more water if needed. Stir in 1/2 cup marinara sauce.
Place 1 1/2 cups of marinara sauce in the bottom of a 9×13 pan. Fill each pepper with the rice mixture. Spoon remaining marinara sauce over peppers.
Cover with foil and bake 35 minutes. Remove foil, baste peppers with any sauce in the bottom. Top with cheddar and bake an additional 10 minutes or until cheese is melted and peppers are tender.
Recipe Notes
If you firmer/tender-crisp peppers, skip the boiling step and bake as directed.
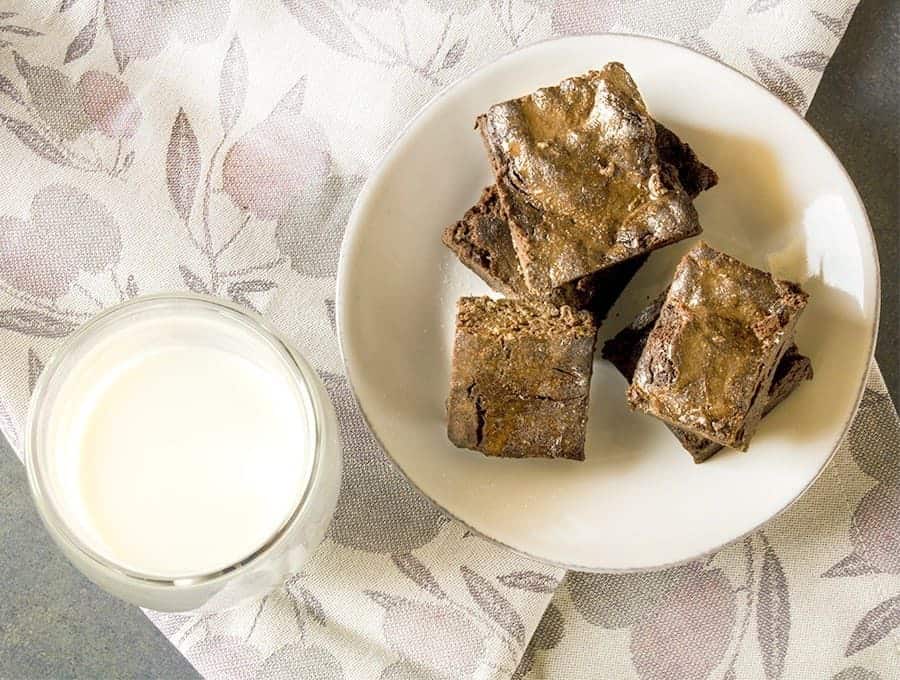
How do you make chocolate brownies better? You mix cheesecake into them. And how do you make chocolate cheesecake brownies better than that?! You manage to make them low carb, which is exactly what I did with this Keto Chocolate Cheesecake Brownies recipe.
This is not a test and this is not a joke. They’re one part deliciously chocolaty brownies and one part decadently sweet cheesecake. Two of the arguably best desserts of all time wrapped into one very delicious package. Make them for your next party or get together. You and your guests will thank me.
In fact, you may be so delighted by me.
And that’s not even the best part. These are Keto Chocolate Cheesecake Brownies. Yup, you’ve read that right. These brownies are actually low carb! Who says that keto dieters don’t get to have all the fun? Not me, that’s for sure.
And if mixing the two desserts doesn’t sound like your cup of tea, I’ve got low carb recipes for both brownies and cheesecake.
KETO CHOCOLATE CHEESECAKE BROWNIES 2
Keto Chocolate Cheesecake Brownies
These Keto Chocolate Cheesecake Brownies are a chocolate cheesecake lovers dream! They’re so good you won’t be able to tell their low carb!
8 ounces (226.8 g) Cream Cheese, cubed and softened
1 (1 ) Egg
3 tablespoons (3 tablespoons) Truvia, or other sweetener
1 teaspoon (1 teaspoon) vanilla extract
Instructions
Preheat oven to 350F.
Grease an 8 x 8-inch square pan and set aside.
For the Chocolate Batter: In a microwave-safe bowl, melt butter and chocolate for about 1 minute. Remove and stir well.
In a bowl, add eggs, sweetener, and vanilla and blend until light and frothy.
Pour the melted butter and chocolate into the bowl in a slow stream and beat again until it is well-incorporated.
Pour the mixture into the pan.
For the Cheesecake Batter: beat together cream cheese, egg, Truvia and vanilla extract. Pour the cheesecake batter on top of the brownie batter. Use a spatula to swirl the two batters together.
Cover the pan with foil. Bake at 350F for 45-50 minutes until a knife inserted in the center emerges clean.
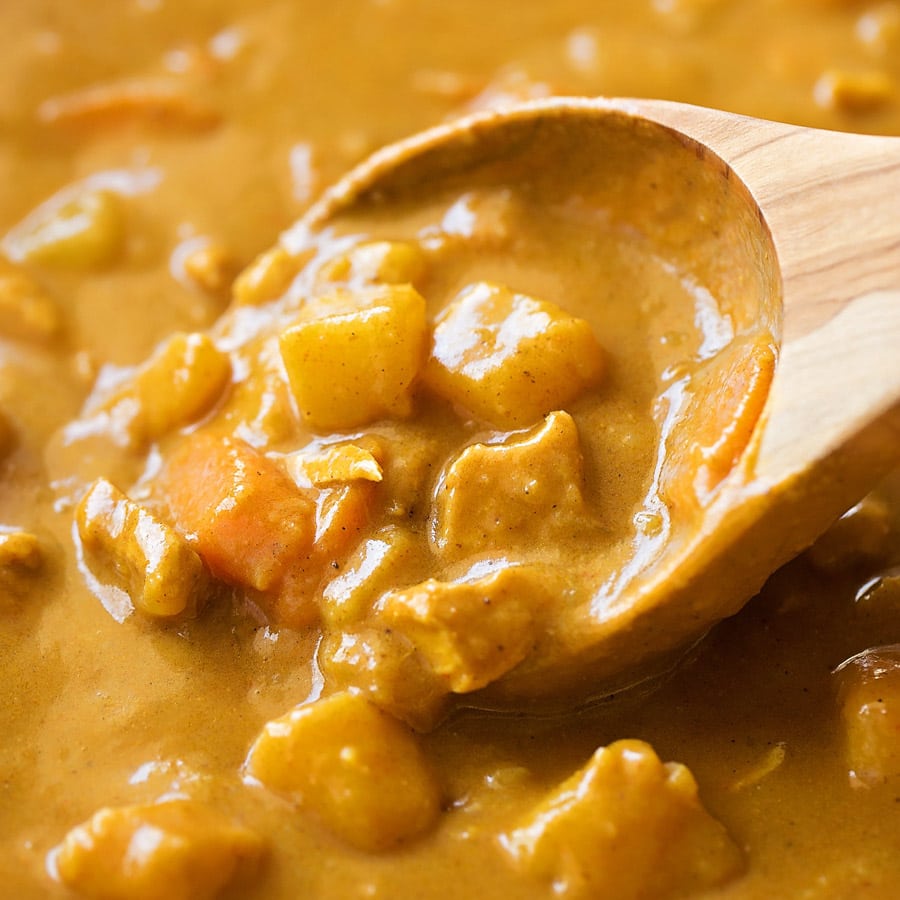
This Delicious Coconut Curry Chicken Is Flavorful And Filled With Potatoes, Carrots And Spices. Serve It With Any Kind Of Rice Or Bread And You’ll Have Made The Perfect Chicken Curry Meal.
COCONUT CURRY CHICKEN
COCONUT CURRY
What to change up the flavors?
This particular yellow curry includes potatoes, carrots and chicken. But you can add whatever veggies you want. What other vegetables go with coconut curry? We like…
Cauliflower
squash
sweet potato
celery root
HOW TO MAKE THAI COCONUT CURRY + COCONUT CURRY SAUCE
Making curry chicken is simple! Sauté the onion and garlic until fragrant, cook the chicken until browned, then stir in potatoes and carrots.
Sprinkle the seasonings over top and add the red curry past along with the yellow curry powder.
COCONUT CURRY TIP: Toasting the seasonings will help develop the flavors in the curry.You wouldn’t believe what a difference it makes!
Pour in the coconut milk (full-fat is recommended) along with the chicken broth (or vegetable broth if you plan on keeping things vegetarian), brown sugar, and fish sauce. Yes, I said fish sauce. A teaspoon gives this coconut curry sauce depth without being detectible, or even worse, overwhelming!
Let the curry simmer for 20 minutes or until it thickens up and the vegetables and chicken are cooked through.
coconut curry 3
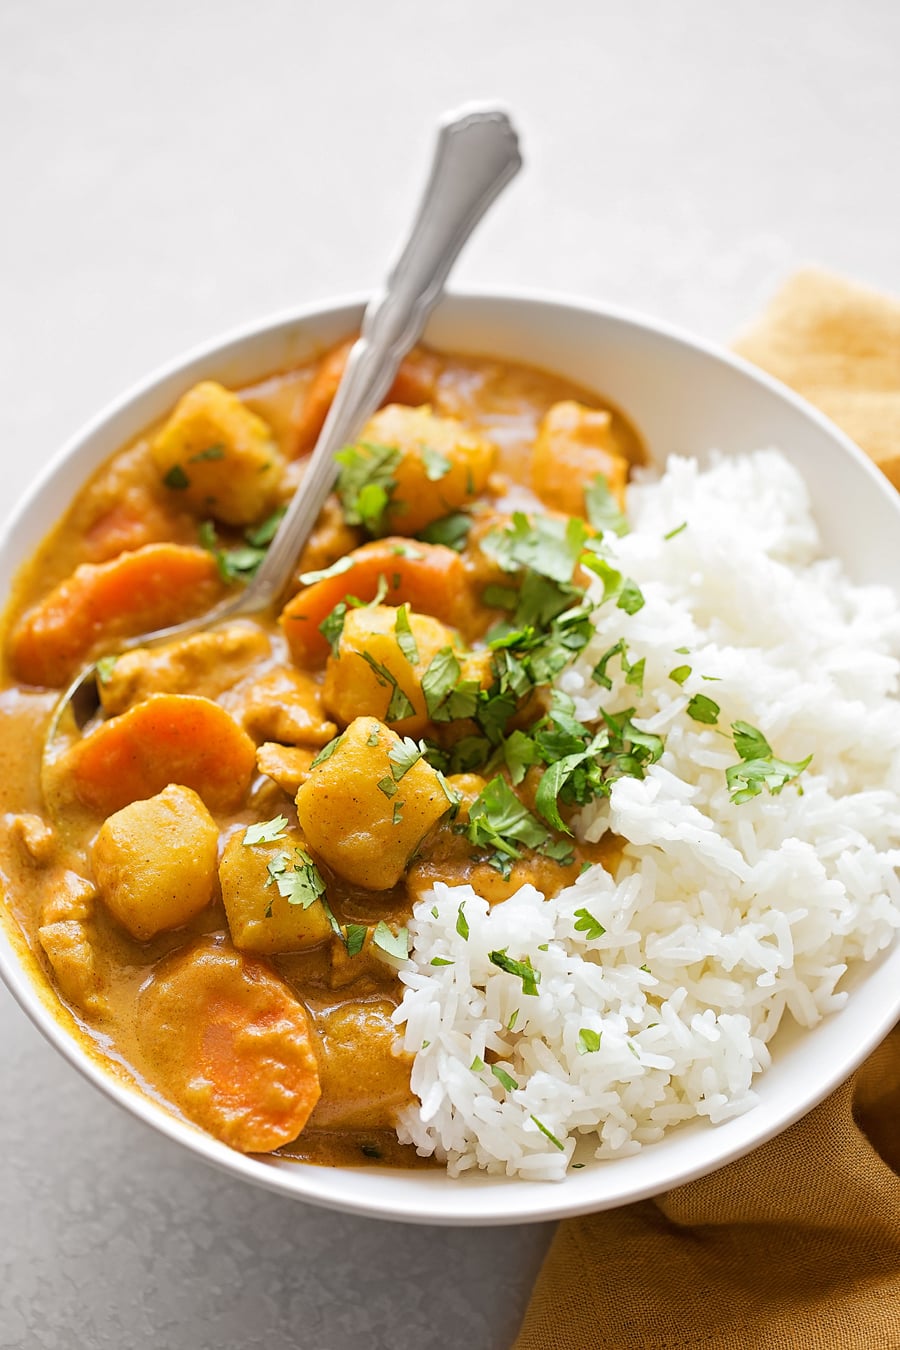
Serve this curry over rice. White rice or brown rice works well with this dish.
Do you have to use full-fat coconut milk for this recipe? That’s what I suggest – it really adds so much flavor to the coconut curry sauce!
How to reheat coconut curry? Store in airtight containers and place in fridge for up to 3 days. To reheat, cook in a saucepan or wok on medium heat until heated through. You can also microwave until heated through.
coconut curry 4
BEST SIDES FOR CHICKEN CURRY
Most veggies, rice and noodles are great with this chicken curry recipe, but other favorites include:
I love this chicken curry recipe because it’s simple, delicious and a meal the entire family enjoys. It’s a quick dinner recipe that requires minimal prep (always a win in my book)! Any leftovers reheat really well the next day, just add a few tablespoons of water to each serving to help thin it out.
Curry Chicken Recipe
This delicious Coconut Curry Chicken is flavorful and filled with potatoes, carrots and spices. Serve it with any kind of rice or bread and you’ll have made the perfect chicken curry meal.
Prep Time
10 minutes
Cook Time
25 minutes
Total Time
35 minutes
Servings
6
Course
Main Course
Cuisine
Indian
Ingredients
1 tbsp. oil
1/2 yellow onion, diced
2 cloves garlic minced
1 lb. chicken breasts cut into 1-inch cubes
3 carrots cut into 1/4-inch slices
2 russet potatoes peeled and cut into 1-inch cubes
3 tbsp. yellow curry powder
1 1/2 tbsp. red curry paste
1 14 oz. can full-fat coconut milk
3 c. low-sodium chicken vegetable broth
2 tbsp. brown sugar coconut sugar
1 tsp. fish sauce
Instructions
In a large skillet set over medium heat, add oil. Once the oil is hot, add the onion and cook for 2 minutes. Add garlic and cook for 30 seconds.
Add chicken and brown, about 3 minutes per side. Add carrots and potatoes, cook until lightly browned. Stir in curry powder and curry pastes. Cook for 1 minute or until fragrant.
Whisk in coconut milk, broth, sugar, and fish sauce. Gently simmer (covered or uncovered) for 20 minutes or until potatoes and carrots are cooked through.
Remove from heat and serve with rice and garnish with cilantro, if desired.
Recipe Notes
– Swap the chicken for 1 can of drained chickpeas, for a vegetarian curry.
– Add chopped roasted cashews or peanuts for added protein and crunch.
Nutrition Information
Amount Per Serving Calories 286, Calories from Fat 63%,Daily Value*Fat 7g 11% Saturated Fat 1g 6% ,Cholesterol 64mg 21%
1009 words. · About 6 minutes to read this article.·
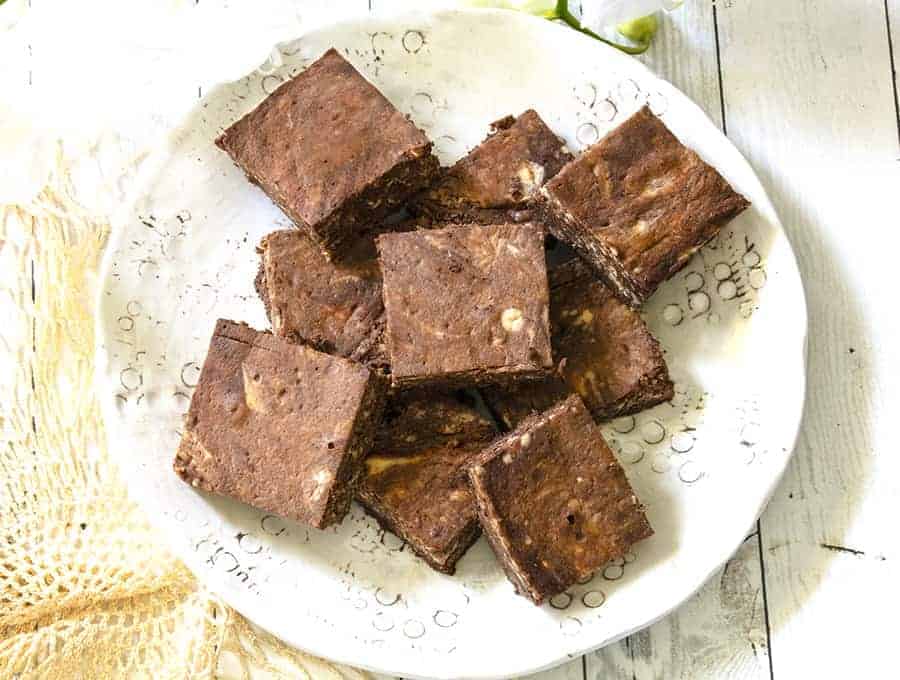
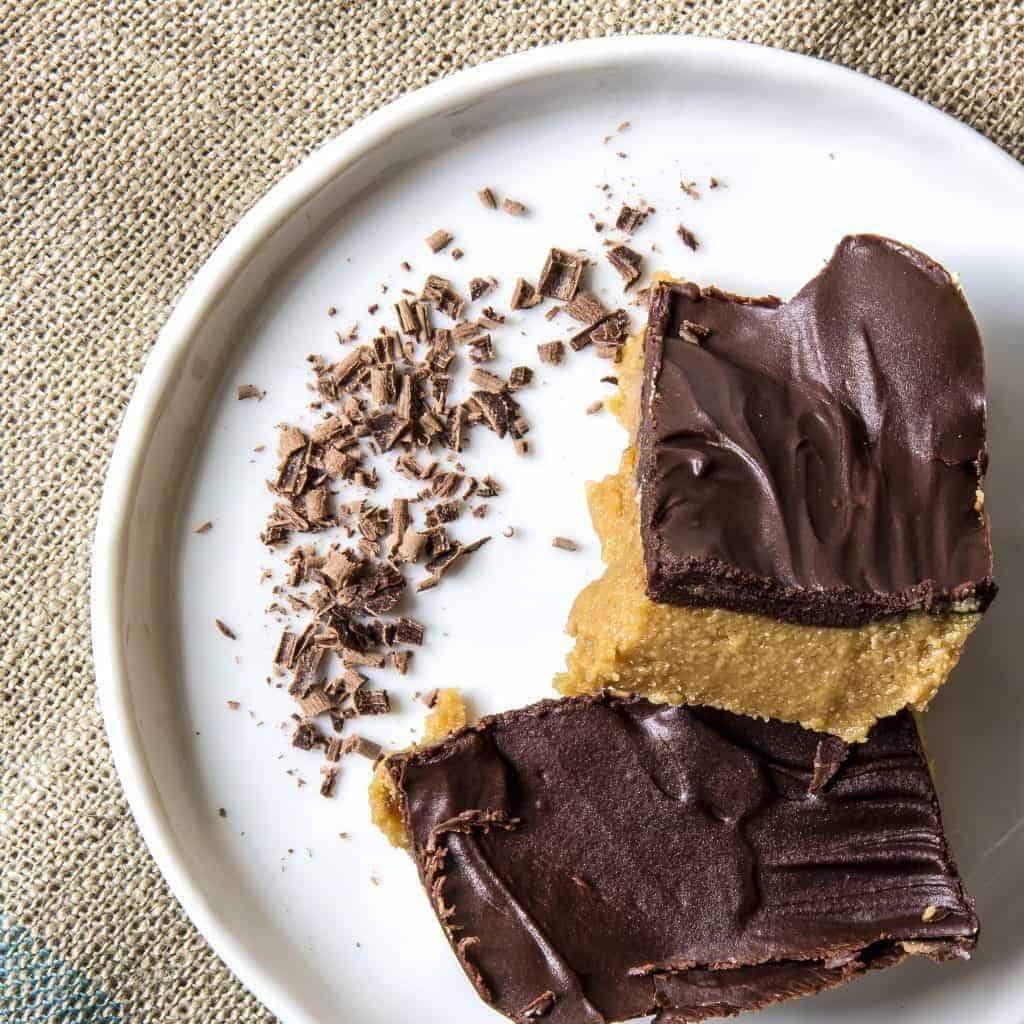
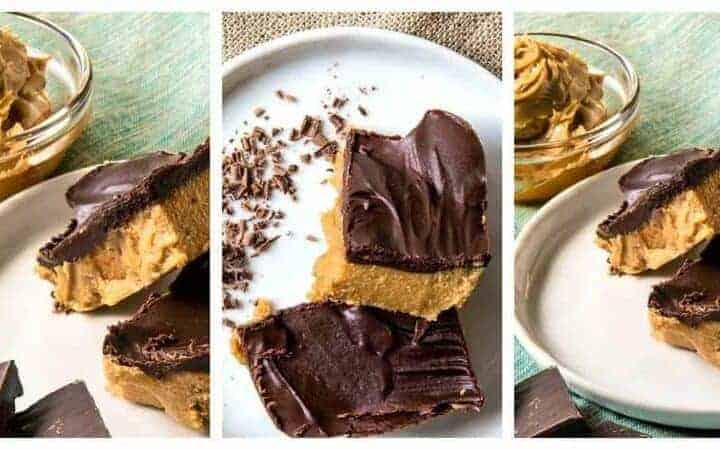
No-Bake Keto Peanut Butter Chocolate Bars will satisfy all of your dessert cravings with almost none of the sugar. Low Carb, low sugar, high fat Peanut Butter Bars make a perfectly delicious keto dessert or fat bomband they taste just like peanut butter cups!
HOW TO MAKE A GREAT KETO DESSERT: NO BAKE KETO PEANUT BUTTER FAT BOMB RECIPE
Mix butter, peanut butter, and Swerve with the almond flour and pat out.
Melt chocolate chips and pour on top.
DO NOT RUSH THIS. Let it solidify in the fridge and let the tastes mingle. If you eat it too soon, it will taste like artificial sugar. Let the tastes meld together and it will be super fantastic. This is true for most keto desserts. You need to let them chill for a bit. Which is good for you in life as well, as it happens.
PEANUT BUTTER CHOCOLATE BARS 3
EQUIPMENT NEEDED FOR THIS KETO DESSERT
Nothing fancy needed.
pastry cutter is used in this recipe but you can also use two knives to cut the ingredients in if you prefer. The pastry cutter does make it easier and you can use it for other recipes as well.
I also like to make these in an 8-inch pan, but it’s a lot easier if you line it with parchment paper if you do that. Comes out very easily that way.
PEANUT BUTTER CHOCOLATE BARS 4
No Bake Keto Peanut Butter Chocolate Bars
No-Bake Keto Peanut Butter Chocolate Bars will satisfy all of your dessert cravings with almost none of the sugar. Low Carb, low sugar, high fat Peanut Butter Bars make a perfectly delicious keto dessert or fat bomb.
Mix all the ingredients for the bars together and spread into a small 6 inch pan
Melt the chocolate chips in a microwave oven for 30 seconds and stir.
Add another 10 seconds if needed to melt fully.
Spread the topping on top of the bars.
Refrigerate for at least an hour or two until the bars thicken up. These bars definitely improve with keeping so don’t be in a huge rush to eat them.
Tips and Tricks
I used a pastry cutter, but you can also use two knives to cut the ingredients in if you prefer. The pastry cutter does make it easier and you can use it for other recipes as well.
I also like to make these in an 8-inch pan, but it’s a lot easier if you line it with parchment paper if you do that. Comes out very easily that way.
Mix butter, peanut butter, and Swerve with the almond flour and pat out
Melt chocolate and pour on top. Some people like to mix in a little coconut oil into the chocolate as it makes it softer
DO NOT RUSH the last part. Let your tasty low carb dessert chill for a while. Let it solidify in the fridge and let the tastes mingle. If you eat it too soon, it will taste like artificial sugar. Let the tastes meld together and it will be super fantastic.